Cardiopulmonary Resuscitation: Definition, Types of CPR, Essential Steps, and More
CPR, or cardiopulmonary resuscitation, is a vital method of saving lives by keeping the blood flowing even after the heart has stopped beating. The technique plays a critical role in maintaining the circulation of the blood after an individual has suffered from cardiac arrest.
According to a report by the Indian Institute of Emergency Medical Services (IIEMS), only 2% of the Indian population knows how to perform CPR. Thus, learning about this lifesaving mechanism is crucial not only for medical students and healthcare providers but also for other individuals to provide the necessary assistance during emergencies.
This article covers when to use CPR, its different types, a step-by-step guide to perform CPR and other crucial aspects.
What is CPR?
The full form of CPR is cardiopulmonary resuscitation, in which the term ‘cardio’ refers to the heart, while ‘pulmonary’ denotes the lungs. Resuscitation is the procedure of ensuring a constant flow of blood and oxygen in the body, which is a vital function played by these central organs.
CPR helps restore the functioning of an individual’s heart after a cardiac arrest. The procedure involves compressing the chest so that the heart can pump blood and come back to its regular rhythm. The CPR process involves breathing oxygen into the patient’s mouth to enhance the oxygen level in the body and help blood flow to the vital organs.
When to Use CPR?
CPR could be required for a person who has stopped breathing as a result of several scenarios, such as:
- Cardiac arrest or heart attack
- Road traffic accidents
- Choking accidents
- Near-drowning
- Poisoning
- Suffocation
- Smoke inhalation
- Drug or alcohol overdose
- Electrocution
- Suspected sudden infant death syndrome
What are the Types of CPR?
Check out the various types of CPR in the section below:
- Standard CPR
In this technique, chest compressions are given with the addition of rescue breaths. You need to provide two rescue breaths in every cycle of 30 chest compressions. This is commonly known as traditional CPR.
- Hands-Only CPR
Another name for compression-only CPR, this technique is all about chest compressions and does not require rescue breaths. It includes providing continuous compressions at a rate of 100-120 per minute.
- Hands-Only CPR with an AED
This technique combines the use of an automated external defibrillator (AED) with manual CPR. The AED gives the heart an electric shock to restore its normal rhythm, and you keep compressing until the machine is ready.
- Paediatric CPR
As its name suggests, this method is used specifically on children or babies. With each cycle, you give 15 compressions and then two rescue breaths.
How to Prepare for Cardiopulmonary Resuscitation (CPR)?
Mentioned below are the common steps to consider while preparing for a CPR procedure:
- If you see a person having a cardiac arrest and they start falling down, call out loudly to ask how they are feeling.
- Call for medical attention immediately if the person does not respond.
- Ask someone around you to fetch an automated external defibrillator (AED).
- Keep the person on their back and tilt their head back slowly.
- Lean in further to check if you hear any heartbeat.
- Look to the chest for rising and falling to see if the individual is breathing.
- Check for a pulse at the neck by feeling.
- If there is no pulse, start CPR immediately.
What is the Step-by-Step Process to Perform CPR for an Adult?
Cardiopulmonary resuscitation is a medical technique that can save lives in emergencies by providing crucial life support. Here is the step-by-step guide on how to conduct CPR effectively on adults:
- Start by assessing the environment to make sure it is safe before reaching the person in need.
- Check if the individual is responsive by tapping them gently and asking if they are alright. Look for any movement or response.
- If the patient is not responsive, immediately call emergency services for help.
- Open the airway by tilting the person’s head back and lifting the chin.
- Listen for breathing by putting your ear beside the person’s mouth and observing for chest rises.
- If the person is not breathing, begin chest compressions. Place one hand on top of the other, lace your fingers together, and keep your elbows locked.
- Give 100-120 compressions per minute, compressing at least 2 inches into the chest and letting it recoil completely between compressions.
- Give two rescue breaths after 30 compressions. Pinch the nose, cover their mouth with yours, and give a one-second breath. Repeat this sequence until medical help arrives.
How to Perform CPR for a Child?
When it comes to children, the CPR procedure is almost identical to that of an adult. The following are some of the key things to consider while performing CPR for children:
- Step 1: Check for Breathing and Signs of Life
- Look at the chest for evidence of normal breathing or movement for no longer than 10 seconds. If the victim is not breathing or has no signs of life, then continue with CPR.
- Step 2: Start Chest Compressions
- Place one hand at the centre of the child’s chest and put your other hand on top, locking your elbows. Give 30 compressions to a depth of around 2 inches at 100-120 compressions per minute.
- Step 3: Perform Rescue Breaths
- Open the airway by lifting the chin and tilting the head back, pinching the nose. Provide two slow and gentle breaths, just enough to raise the chest.
- Step 4: Repeat CPR Cycles
- Continue repeating 30 chest compressions and two rescue breaths. Repeat the cycle until you notice signs of life, an AED is available, or medical help is on the scene.
- Step 5: Infant CPR (Alternate Method)
- For infants, use the two-finger technique for compressions on the chest, 1.5 inches deep, at a rate of 100-120 times per minute. Make sure that the chest returns to its normal position after each compression.
- Step 6: Perform Chest Compression
- For younger kids, use a single hand to do chest compressions with a downward pressure of 2 inches at the same rate of 100-120 per minute. The compression should be firm enough but not too hard for their smaller chests.
- Step 7: Deliver the Rescue Breath
- Carefully cover the child’s nose and mouth with your mouth and exhale a slow, gentle puff to raise the chest.
- Step 8: Continue Until Help Arrives
- Keep performing CPR until there are signs of life or the EMS (Emergency Medical Services) personnel arrive.
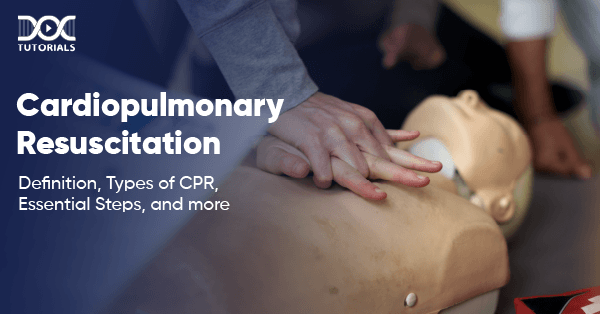
Consider checking out a CPR diagram to get a visual idea of how this procedure is performed. It will help you gain a more detailed idea of what exactly you need to do, which can be a lifesaver during emergencies.
FAQs About Cardiopulmonary Resuscitation
- What should be done after CPR?
After CPR, the individual is sent to a hospital. Doctors analyse for organ damage, determine the cause of the cardiac arrest, and adopt necessary treatment methods. In a few cases, the survivors may also go into a coma.
- How can we comprehend whether CPR is effective?
Cardiopulmonary resuscitation (CPR) can still be effective, even if the method is not performed perfectly. To check whether it is effective, you can look for the chest rise during rescue breaths.
- When is CPR performed?
CPR is performed in the event of an emergency when an individual’s breathing or heartbeat stops.
- What is the purpose of CPR in nursing?
The purpose of CPR in nursing is to assist in saving a life by maintaining oxygenation of the brain and other critical organs until advanced medical intervention is provided.
- What are the limits for CPR?
The optimal duration of CPR is approximately 55–62 minutes in patients with shockable rhythms and 24–34 minutes in patients with non-shockable rhythms.
Conclusion
Learning CPR properly and applying the same during emergencies can restore a heartbeat and save lives. As a post-graduate medical student, if you are preparing for the NEET PG exam and want to learn about CPR in further detail, DocTutorials has you covered.
Here, we provide complete NEET PG study materials, professional video courses, a Quick Revision Program (QRP), and interactive study aids for aspiring medical students.


Latest Blogs
-

INI CET Exam 2026: Your Roadmap to Success – Key Topics, Strategies, and Lessons from Last Year’s Papers
The INI CET exam is more than just a test; it’s a significant milestone for many medical students aiming to…
-

INI CET Exam Success: Previous Year Question Papers & Ultimate Guide – INI CET PYQ
One can feel overwhelmed while preparing for the INI CET (Institute of National Importance Combined Entrance Test). A vast syllabus,…
-

NEET PG 2026 Preparation with Live Power Pack: Your Path to Success in 2026
Preparing for the NEET PG 2026 can be an overwhelming journey because of its vast syllabus and the pressure to…
Our Courses
Our Offline Centers

Scan and download the app

OR