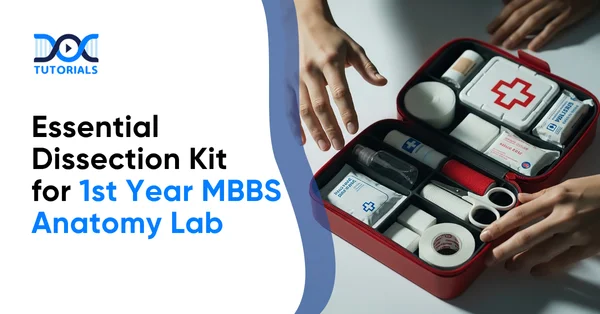
Essential Dissection Kit for 1st Year MBBS Anatomy Lab

Preparing for the first year of MBBS means diving headfirst into human anatomy through hands-on cadaver dissections. This is a practical experience because textbooks cannot replicate the complexity of real human anatomy.
To maximise these sessions, a dissection kit is necessary, as it provides students with tools for accurately cutting, holding, and studying tissues without causing harm. In practical terms, selecting the proper dissection kit on MBBS is as crucial as the selection of the proper textbook or stethoscope.
An effective kit provides clean, efficient work, allowing students to concentrate on learning instead of searching for the instruments. This list includes all the most essential tools and protective equipment first-year students will require. It is important to highlight that this kit is not just scalpels, but a toolbox for the anatomy lab.
Keep reading for a detailed insight into the essential dissection instruments for the 1st year MBBS anatomy lab.
What are the Must-Have Instruments for Your Dissection Kit?
A comprehensive anatomy dissection kit contains several categories of instruments. Each tool has a specific role in the cadaver lab. Key components include:
- Scalpel Handle and Blades
The tool contains a reusable No. 3 handle with one or two disposable blades that are used to make fine cuts. As an example, we have No. 10 blades that handle serious cuts, No. 11 that handle puncture or fine cuts, and No. 15 that handle delicate and small cuts. Always carry a supply of spare sterile blades.
- Dissecting Scissors
High-quality surgical scissors are essential in the dissection of soft tissues and fascia. Students often require 2 categories of scissors: Sharp-blunt scissors (one sharp end, the other blunt) for general cutting and blunt dissection, and Iris scissors (tiny, very fine blades) for very delicate work. The cutting of thicker tissues is also performed with Mayo scissors (straight or curved).
- Forceps (Tissue and Dressing)
Tissues are grasped, retracted, and manipulated with the help of forceps. The tissue forceps have interlocking teeth (e.g. Adson forceps) which clasp the tissue without crushing it. Dressing forceps are serrated, flat-tipped instruments used to gently manipulate non-living substances (such as gauze) or tissue. Carry at least one pair of each type.
- Dissecting Needles & Probes
Teasing and separation of tissue layers are done with the help of fine needles (straight and angled), while exploring body cavities and separating body structures are done with the help of probes (blunt, round-tipped). Probes are useful in investigating deep or hidden anatomy without incision.
- Bone Cutter or Ronger
In case the curriculum involves the joint or limb dissection, a bone cutter (heavy-duty shears) is required to slice through the cartilage and bone. This gives one access to the skeletal deep structures. All first-year dissections do not necessitate the need to cut a bone, although most kits contain a tiny bone-cutting tool of some sort.
- Measuring Ruler
To measure parts of the specimen, a small stainless steel ruler (15-20 cm metric) is required. Proper measurements assist in recording the findings (e.g. size of organs or distances between landmarks) and enhance anatomical drawings.
- Dissection Tray & Wax Pad
A strong dissecting tray (often metal) offers a firm work surface. The bottom of most of the trays is lined with a piece of wax or rubber so that you can pin specimens in. Pinned specimens do not move during dissection, so they can be explored in detail.
- Pins and Clips
The kit contains T-pins or insect pins to hold the tissues on the wax pad. The bigger pieces can be held by bulldog clips or binding clamps. These are used to position organs or limbs out of the way during the isolation of structures.
- Personal Protective Equipment
Safety gear is non-negotiable. These should include disposable gloves, a face mask and safety goggles. Use gloves to protect your hands from bio-hazards, a mask to shield your face from harmful fumes of formalin, and goggles (or a face shield) to protect your eyes from splashes.
An apron or clean lab coat is also needed to ensure the clothing is sterile and an extra form of protection.
- Scalpel Blade Remover
It is a basic clamp that allows the safe removal of used scalpel blades. Do not use bare hands to remove the blade; instead, use the appropriate tool to prevent cuts.
- Hand Sanitiser & Wipes
Having a small bottle of hand sanitiser and a few disinfectant wipes will help you clean instruments and hands in between processes. To avoid contamination, hygiene is important in the lab.
Each of these items is critical for safe, efficient dissection. For a quick overview, the table in the next section summarises the instruments and their uses.
What is the Purpose & Typical Use of the Dissection Kit Instruments?
Each of these items is critical for safe, efficient dissection. For a quick overview, the table below summarises the instruments and their uses:
| Instrument | Purpose & Typical Use |
| Scalpel & Blades | Sharp cutting tools for initial incisions. (No.10 blade when making large cuts, No.15 when making small cuts). |
| Dissecting Scissors | Dissection of soft tissues; there is one sharp end and one blunt end to make the dissection controlled. Typical ones are iris scissors (fine) or Mayo scissors (thicker tissues). |
| Tissue Forceps | A pair of tweezers fitted with tiny teeth is used to hold the fragile tissues firmly. |
| Dressing Forceps | Serrated flat-ended tweezers to hold bandages or large pieces of tissue. |
| Probes | Blunt tools for exploring cavities or gently separating tissue layers. |
| Needles (Teasing) | Teasing needles (straight/angled), sharp and fine, to tear apart tissues and examine them. |
| Bone Cutter | Major shears to cut bone/cartilage in order to access deep structures. |
| Ruler | A metric ruler for measuring anatomical structures precisely. |
| Dissection Tray | A metal tray is lined with wax or rubber to hold pin specimens in place. |
| Pins & Clips | Fix specimens onto the tray; secure flaps of tissue for visibility. |
| Gloves | Protect hands from chemicals and biohazards. |
| Mask & Goggles | Goggles keep the eyes out of the splash; mask filters the smell of formalin fumes. |
| Lab Coat | Wear clean clothes and add an additional layer against spills. |
| Blade Remover | Used scalpel blades should be disconnected in a safe manner to avoid accidental wounds. |
| Hand Sanitiser | To disinfect hands/tools fast when required. |
A proper MBBS dissection kit may include over a dozen instruments.
For instance, World Precision Instruments offers a 23-piece student dissection kit with scalpels with blades, forceps (dressing, tissue, and Adson), dissecting scissors, Kelly forceps, a Mayo-Hegar needle holder, teasing needles (angled & straight), hooks with a chain, a grooved director, a stainless steel ruler, and a dropper. These are all packed away in a padded case.
Although not all students would require all of the tools mentioned, this would be an example of the variety of instruments an anatomy dissection kit could have. In India, standard MBBS kits include the above items, the core ones, and even magnifiers that can be used to enhance visualisation of finer detail.
How to Choose the Right MBBS Dissection Kit?
When selecting a kit, quality and practicality are key. Here are the things to keep in mind:
- Consider Quality: Never use anything except medical-grade stainless steel; it will remain sharp and will not rust. Very cheap kits that have weak alloy or plastic parts should be avoided. Even in stainless kits, seek familiar brands or trusted merchants.
Indicatively, Myaskro kits (produced in India) offer enhanced grip and sharpness, whereas foreign vendors such as DR Instruments hawk carefully selected student anatomy sets.
- Cost Matters: Basic dissection kits for MBBS are quite affordable in India. Companies that sell online stock 10-15-piece stainless steel sets at approximately ₹500-600. As an example, one of the Amazon products displays a first-year MBBS stainless steel kit that costs approximately ₹550.
Such budget kits usually contain the basics and a plain case. The more expensive kits cost between ₹800-1200 or higher, offering superior quality in assembly and completeness. Most students would prefer a mid-range kit with good steel.
It would be prudent to purchase them at medical supply stores or reputed online retailers who stock anatomy dissection kit bundles, particularly among MBBS students.
- Check for the Essential Tools: When purchasing, make sure that the kit has at least one No.3 scalpel handle and a few types of common blades, two sharp/blunt scissors, two tissue forceps, two dressing forceps, a probe, needles, and a measuring scale. Extra tools that are useful include a special dissection tray or rubber mat, T-pins, and a blade-removal clamp.
Do not forget about shipping time and availability. Other colleges have a list of approved kits or local market shops where students are able to purchase kits on the local market.
How to Maintain and Care for Your Dissection Kit?
Once you have your dissection kit, proper maintenance will keep it ready for years. Here are some key care tips to consider:
- Clean Instruments After Each Use: Wash all the metal tools immediately after lab with warm water and some mild soap, and remove any tissue residue. This inhibits corrosion and makes them safer to deal with in the future.
- Disinfect Properly: Wipe or dry instruments in alcohol or disinfectant solution after washing. The tools can be sterilised to minimise risks of contamination (particularly when the tools are used by more than one student).
- Sharpen Cutting Tools: Keep scalpels and scissors sharp for precision. Sharpen a tool using a proper sharpening tool or service: dull blades can cut and may rip tissue. There are even sharpening guides with some of the kits.
- Store Securely: It is always recommended to put the instruments in the case or tray when not in use. An organised case with a zip or lid will prevent loss, avoid accidental damage, and keep everything organised.
- Replace Disposable Items: Scalpel blades, needles, masks, and gloves are disposable. Blades and needles should be changed on a regular basis to ensure sharpness and hygiene. You must have spares of gloves and blades.
By following these steps —cleaning, disinfecting, sharpening, and organising storage —your kit will remain safe and effective. A well-maintained kit lasts through the first year and beyond, so invest a little time in upkeep.
What are the Best Practices for MBBS Students with a Dissection Kit?
Having all the right tools is one thing; using them effectively is another. Here are some practical tips for 1st-year MBBS anatomy lab students:
- Know Your Tools: Before starting the dissection, take time to name all the instruments and learn their use. With practice, as much as possible, use scissors, forceps, and scalpels on artificial models or towels. Being familiar will ensure you are quicker and more confident when doing a dissection.
- Follow Safety Protocols: Gloves, mask, and goggles should always be worn in the lab. Manage scalpels and sharp forceps respectfully: make gentle and controlled movements and avoid excessive force. Always remember that people could be busy nearby; do not leave your instrument with its sharp edge open near people.
- Stay Organised: Keep your tray neat. Lay out the fewest tools you need at one time. When not in urgent need, tuck knives and needles in their stores or sheaths. Pin and clip tissues to one side to reveal the structures that you are dissecting. A clean tray minimises errors.
- Use Gentle Technique: Slowly and carefully dissect tissues. Attempt to maintain structures, instead of cutting them irresponsibly. This is particularly critical in anatomy; harming an anaerobic nerve or vessel may cause difficulty in further research.
Whenever possible, cut through natural tissue planes. When the item is flattened, a probe or needle can be used to tease it open instead of force.
- Ask for Guidance: Don’t hesitate to ask teachers or senior students in case you are not sure about an instrument or technique. It is always advisable to seek assistance rather than to spoil a specimen or to hurt oneself. In the long run, you will be able to handle each tool correctly.
By combining a complete anatomy dissection kit with these study habits, students can navigate the anatomy lab confidently. Remember, mastering dissection is a skill developed over many hours of practice. A top-notch kit gives you the tools you need; good technique and care of instruments keep you safe and effective.
How to Budget When Buying Dissection Kits?
In the Indian market, there are affordable but quality MBBS dissection kits that are readily available. Medical students usually suggest shopping in specialised shops or on the internet. As an example, Dishan and Forgesy/Exotique are brands that retail student kits between ₹500 and ₹800.
Basic stainless kits can be found online at online marketplaces for approximately ₹550. High-quality kits containing additional parts may cost as much as ₹1500 to 2000. It is more prudent to review product reviews and ensure that the kit is designed to be used in MBBS/medical (not just a general biology kit).
There can also be seniors who organise study groups where they can order kits in bulk at a discount. Wherever possible, make a habit of examining the kit. Make sure that the scissors and forceps are correctly positioned and solid.
Hold the scalpel handles to observe that the blades lock. A handle that is not expensive and has a loose blade may be hazardous. Another thing to consider is the carrying case; a padded and organised case is much better than a plain pouch.
FAQs about Essential Dissection Kit for 1st Year MBBS Anatomy Lab
1. Do I need to sterilise my instruments before each use?
Yes, sterilising is essential so that there is no contamination and it is hygienic. Alcohol wipes or disinfectants should be used to clean tools at the beginning and end of each session. Additional precautions include some students using UV (ultraviolet) sterilisers or boiling at home as an additional precaution.
2. What is the role of a blunt probe in dissection?
A blunt probe is a non-cutting tool, which is used to:
- Separate tissues gently
- Trace nerves, vessels, or ducts.
- Avoid the destruction of structures in the process of searching anatomical spaces.
It is particularly helpful to sort out layers and mark out pathways in complicated areas.
3. Are stainless steel instruments better than other materials?
Yes, dissection instruments should be made of stainless steel as they have:
- Corrosion resistance
- Durability and strength
- Ease of sterilisation
- Shiny finish to allow accurate handling.
The tools that are made of plastic or those of low-quality metals are easily bent, rusted or broken, and this can hamper your dissection experience and your safety.
4. Are disposable scalpel blades safe and effective?
Yes, disposable scalpel blades are safe, sharp, and hygienic. They come in a single-use version to avoid contamination and provide accuracy. They are always to be handled carefully, and the used blades should be discarded in a sharps container to prevent injury.
5. Do I need to buy a boneset or skull model along with the dissection kit?
Although optional, owning a boneset model or skull is quite useful in:
- Learning osteology and bone marks.
- Training on practical exams and viva.
- Visualising anatomical connections.
Bonesets, skulls, and dissection kits are often sold together in a single bundle on numerous sites and make a good investment to buy during the first year as an MBBS student.
6. How do I choose between toothed and non-toothed forceps?
Toothed forceps have a design that helps in holding harder tissues such as skin and fascia without slipping. They are equipped with small teeth which interlock, ensuring a strong hold.
Untoothed forceps, on the other hand, are smoother and applied in fragile organs like blood vessels, nerves, or thin membranes. A combination is always good, so that you can treat various types of tissue.
Conclusion
An MBBS-level dissection kit is more than a tool kit; it is the door to the student’s learning of how the human body works. First-year students invest in quality equipment (stainless steel, complete sets) and training on the use of this equipment, thus providing a strong base to their medical education.
When you are building your kit, remember that practice is key: get acquainted with every tool, ensure it is in the best condition, and above all, use the tools in the safest way possible. With the right anatomy dissection kit and proper technique, you will be confident in the gross anatomy lab and be ready to face the challenges of medical school.
Apart from that, if you’re seeking added support for the 1st year in MBBS, DocTutorials has got you covered. Our comprehensive MBBS curriculum equips students with complete syllabus coverage, end-to-end exam preparation support, structured mentorship and guidance, and even complimentary hardcopy notes.
Join DocTutorials today and explore our MBBS curriculum to excel in your medical career!
Latest Blogs
-

INI CET Exam Pattern 2025: A Complete Guide with Subject-Wise Weightage
The Institute of National Importance Combined Entrance Test (INI CET) is your key to entering some of the most prestigious…
-

NEET PG Registration 2025: An Essential Guide For Exam Prep
The NEET PG registration, which is conducted online, is a crucial step in the exam process. Filling out the NEET…
-

NEET PG Syllabus 2026: A Must-Have Complete Guide for Exam Success
The NEET PG Syllabus acts as one of the foundation stones for aspiring postgraduate medical students like you who are…


