Mastering Laparoscopy Surgery: Essential Guide for PG Residents
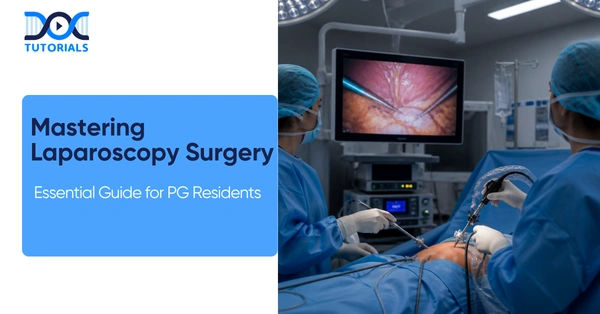
The transition from open procedures to minimally invasive techniques demands a high level of technical precision and unwavering focus. Laparoscopy surgery presents a uniquely steep learning curve, primarily due to the distinct lack of tactile feedback compared to traditional open surgery.
For a PG resident, mastering laparoscopy is not just about understanding the steps of a procedure, but developing an intimate familiarity with the equipment, the physics of the instruments, and the rigid safety protocols required to navigate this complex environment. Crafting high-yield knowledge for surgical residents, this guide serves as a foundational resource to elevate your competency in the operating theater.
Get High Quality, High Yield Surgery PG Residency Notes for Free!
The Fundamentals of Setup and Patient Positioning
Before making a single incision, the foundation for a successful laparoscopy surgery is laid out in the operating theater setup. Proper patient positioning is paramount and is dictated strictly by the intended surgical site and the patient’s specific pathology. For non-pelvic pathologies, particularly in male patients, a flat position is universally standard. This allows for straightforward access to the upper abdominal quadrants and generalized exploration.
Conversely, when addressing pelvic pathology, particularly in female patients, or when the preoperative diagnosis remains unclear, the modified lithotomy position is the standard of care. This positioning provides the necessary access to the lower pelvis while allowing the surgeon and assistant to maneuver comfortably around the primary port at the umbilicus and alternative ports at Palmer’s point (left subcostal/LUQ) or the left lower quadrant (9th intercostal space).
The Veress Needle: Mechanics and Mandatory Safety Tests
Gaining safe initial access to the peritoneal cavity is often the most critical portion of laparoscopy surgery. The Veress needle is designed specifically to mitigate the risks associated with blind entry. Understanding its mechanics is crucial: during Stage A (traversing tissues like the fascia and muscle layer), the needle faces resistance, causing the inner blunt shield to retract and exposing the sharp edge for penetration. Once it enters the gas-filled peritoneal cavity (Stage B), the lack of resistance allows the blunt tip to spring forward, safely covering the sharp edge and protecting underlying viscera.
However, relying solely on the mechanical “click” of the Veress needle is insufficient. PG residents must rigorously perform mandatory safety tests pre-insufflation. The Click Test should yield exactly two clicks at the umbilicus, indicating successful traversal of the fascia and the peritoneum. The Aspiration Test utilizes a syringe to ensure no blood or bowel content is drawn up. The Drop Test confirms that saline flows freely down the needle without resistance. Finally, the VIP (Volume, Initial Pressure) Test must register an initial pressure of less than 10 mmHg before insufflation can safely commence.
Q: What are the absolute contraindications for performing laparoscopy surgery?
A: The absolute contraindications for laparoscopy surgery are severely restrictive and include a ruptured diaphragm combined with a tension pneumothorax, as well as overarching hemodynamic instability.
Navigating Trocars and The Hasson Technique
Following successful insufflation via the Veress needle, selecting the appropriate trocar is the next critical step. Trocars act as the working channels for all subsequent laparoscopy instruments.
For patients presenting with a history of previous abdominal surgeries or suspected severe adhesions, blind entry using a Veress needle carries an unacceptably high risk. In these scenarios, the Hasson Technique (open entry) is the absolute safest method. This technique involves direct surgical dissection down to the peritoneum, the insertion of a blunt obturator, and securing the port with fascial sutures to create an airtight seal.
Laparoscopic Trocar Selection Guide
| Trocar Type | Primary Characteristics | Best Use Case / Notes |
| Disposable | Sharp, expensive, shield mechanism. | Standard initial entry when budget allows. |
| Reusable | Stainless steel, cost-effective, maintenance heavy. | Ideal for high-volume surgical centers. |
| Optical | Direct vision entry. | Provides visual confirmation during tissue traversal. |
| Bladeless | Radial dilation (separates fibers). | Reduces hernia risks by separating rather than cutting. |
Instrument Anatomy and Ergonomic Precision
Laparoscopy surgery requires instruments designed to act as extensions of the surgeon’s hands. A standard laparoscopic instrument ranges from 33 to 36 cm in length, while bariatric instruments extend up to 45 cm to accommodate thicker abdominal walls. The anatomy of these tools includes a ring handle for tactile feedback, a rotation knob allowing 360-degree orientation, a ratchet mechanism for locking tissue, and an insulated shaft—which is essential for electrosafety.
Ergonomics play a massive role in reducing surgeon fatigue during prolonged procedures. The ideal grip angle for laparoscopic handles is between 140 and 143 degrees. Handle variants include the Pistol Grip (often used for high force applications or staplers) and the Axial grip (ideal for precise hooks or suction tools).
Distal Effectors: The Working Ends
The distal effectors (tips) of laparoscopic instruments dictate their specific function. Graspers must be selected carefully based on tissue fragility, while scissors are frequently connected to electrosurgery units and feature serrated edges to prevent tissue slip during transection.
Distal Effectors and Their Surgical Applications
| Effector Name | Design Classification | Primary Surgical Function |
| Maryland Dissector | Atraumatic (Manipulation) | Gentle tissue manipulation and fine dissection. |
| Cobra / Alligator | Traumatic (Resection/Removal) | Aggressive grasping for resection or tissue removal. |
| Metzenbaum Scissors | Cutting | Precise tissue transection; often electrified. |
| Needle Holder | Suturing (Tungsten Carbide) | Secure grip on needles for intracorporeal suturing. |
Advanced Energy Devices and Complication Management
Modern laparoscopy surgery relies heavily on advanced energy devices for simultaneous exposure and hemostasis. The Ultrasonic (Harmonic) scalpel utilizes high-frequency vibration for cutting with exceptionally low thermal spread. Alternatively, Advanced Bipolar devices (like Ligasure) provide reliable vessel sealing jaws for larger vasculature. For exposure, instruments like the Fan Retractor expand inside the cavity for broad organ retraction.
With advanced energy comes the profound risk of insulation failure. PG residents must adhere to strict maintenance protocols, including disassembling and enzymatically cleaning instruments to remove bio-burden. Checking the insulation on shafts is mandatory; an invisible break can cause capacitive coupling, leading to severe, unnoticed bowel burns outside the visual field. Mechanical failures, such as a broken jaw fragment, or a lost instrument inside the abdomen, require immediate retrieval, potentially forcing a conversion to open surgery.
Recognizing Complications and Indications for Conversion
Recognizing when to convert a laparoscopy surgery to an open procedure is a hallmark of a mature surgeon. Indications include massive bleeding, iatrogenic injury, a bloody visual field, severe adhesions (“frozen abdomen”), or obesity limitations resulting in critically poor angles. If visualization is the primary issue, troubleshooting should be systematic: change the scope (swapping a 30-degree for a 45-degree), adjust the patient position (adding tilt or Trendelenburg), or add a suprapubic port to change the instrument.
Looking ahead, future trends in laparoscopy surgery heavily feature robotic integration equipped with haptic feedback, closing the gap on the lack of tactile sensation, alongside 3D-printed patient-specific instrument designs.
Frequently Asked Questions (FAQs)
1. What is the main disadvantage of laparoscopy surgery for beginners?
It possesses a steep learning curve and severely lacks the tactile feedback present in open surgery.
2. When is the modified lithotomy position required in laparoscopy?
It is strictly required for females with pelvic pathology or whenever the preoperative diagnosis remains unclear.
3. How does a Veress needle prevent visceral injury during entry?
Once it passes through the fascia and enters the gas-filled peritoneal cavity, lack of resistance allows a blunt shield to spring forward and cover the sharp edge.
4. What constitutes a successful Click Test for the Veress needle?
Hearing exactly 2 clicks at the umbilicus, signaling traversal of both the fascia and the peritoneum.
5. What is the target pressure for the VIP test before insufflation?
The initial pressure must register at less than 10 mmHg before insufflation can safely commence.
6. Who is the ideal candidate for the Hasson Technique?
Patients with a history of previous abdominal surgeries or those suspected of having severe intra-abdominal adhesions.
7. Why is checking the insulated shaft of a laparoscopic instrument critical?
It is absolutely mandatory for electrosafety; invisible breaks or compromised insulation can lead to capacitive coupling and catastrophic bowel burns.
8. What is the standard length of a laparoscopy surgery instrument?
Standard instruments range from 33-36 cm, while bariatric variations extend up to 45 cm.
9. How does an Ultrasonic (Harmonic) device safely cut tissue?
It cuts using high-frequency vibration, which has the distinct benefit of creating very low lateral thermal spread.
10. What are the primary indications for converting to open surgery?
Massive bleeding, unmanageable iatrogenic injury, severe adhesions, or insurmountable equipment limitations and poor angles due to obesity.

Latest Blogs
-

NEET SS Exam 2024: Analysis, Key Dates, Counselling
The NEET SS 2024 exam kicked off on March 29, 2025. Over two days and two slots, candidates across 13…
-

INI SS Topper: 1 Dream, 1 Study Buddy, 1 Rank – The Journey of Dr. Prithivi Raaj, CML 1 & (AIIMS) AML 1 in DM Cardiology
Achieving the top rank in a competitive exam like the INI SS DM Cardiology requires tireless dedication, a structured approach,…
-
INI SS Results: Merit List, Exam Insights, and What Comes Next
The INI SS results for October 2024 are just around the corner. This is a life-changing moment for thousands of…