guide Archives - Page 2 of 4 -

Popliteal Fossa: Anatomy, Boundaries & High-Yield Concepts for MBBS
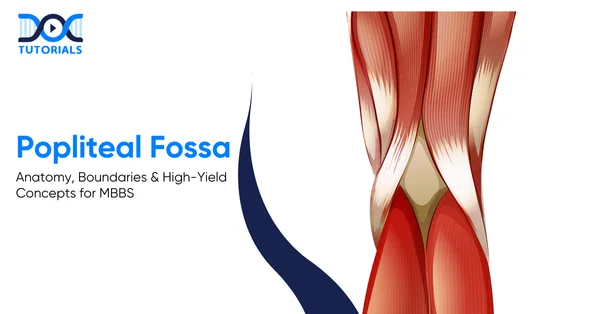
Popliteal Fossa | DocTutorials

The popliteal fossa is a diamond-shaped depression at the back of the knee that serves as a significant point of transition for vessels and nerves passing between the leg and the thigh. Although it may appear as a simple depression, it contains several structures that are critical for lower-limb function.

For MBBS students, a clear explanation of its layout, relationships, and clinical significance is necessary. Let’s take an in-depth look at the popliteal fossa and its key anatomical and clinical features. Keep reading to learn more.

What is the Anatomy of the Popliteal Fossa?

The popliteal fossa contains the popliteal vessels, sciatic nerve branches, and the short saphenous vein. Its muscular boundaries provide stability, support knee movement, and protect these vital structures.

The popliteal fossa allows the passage of large nerves, arteries, veins, and lymphatics as they travel between the thigh and leg. Some of the structures passing through this region include the terminal branches of the sciatic nerve, the popliteal artery and vein, and the short saphenous vein.

It has a number of muscles that form its borders, and when combined, they form a stable yet flexible area that aids knee movement and protects the fine neurovascular elements. Knowledge of such muscular and fascial boundaries is the basis for clinical examination and surgery.​

What are the Boundaries of the Popliteal Fossa?

The popliteal fossa is bordered superiorly by the semimembranosus, semitendinosus, and biceps femoris, and inferiorly by the heads of the gastrocnemius. Its floor is formed by the distal femur, posterior capsule, oblique popliteal ligament, and popliteus. The popliteal fascia forms the roof and is pierced by the short saphenous vein and sural nerve.

Several muscles contribute to its borders, and together they create a stable yet flexible region that supports knee movement while safeguarding delicate neurovascular elements.

Understanding these muscular and fascial boundaries forms the foundation for clinical examination and surgical approaches:

  1. Superior Boundaries

The superior boundaries of the popliteal fossa consist of:

  • Superomedial: Formed by the semimembranosus and semitendinosus muscles
  • Superolateral: Formed by the long head of the biceps femoris
  1. Inferior Boundaries

The inferior boundaries of the popliteal fossa are:

  • Inferomedial: Medial head of the gastrocnemius
  • Inferolateral: Lateral head of the gastrocnemius (with plantaris occasionally contributing)
  1. Floor

The floor is composed of several structures arranged from superior to inferior:

  • The posterior aspect of the distal femur
  • The posterior capsule of the knee joint
  • The oblique popliteal ligament
  • The popliteus muscle
  1. Roof

The roof is formed by the strong popliteal fascia, which continues upward as the fascia lata and downward as the deep fascia of the leg. This tough fibrous layer acts as a protective cover while maintaining the structural integrity of the fossa.

The short saphenous vein and sural nerve pierce this fascia, making them easily identifiable during surgical procedures.

What are the Nerves in the Popliteal Fossa?

The popliteal fossa contains major superficial nerves that are prone to injury. The tibial nerve runs centrally, supplying posterior leg muscles and contributing to the sural nerve. The common fibular nerve follows the biceps femoris and curves around the fibular neck, where its exposed position makes it especially vulnerable before dividing into superficial and deep branches.

Although the fossa itself contains abundant fatty tissue, it is also home to several significant nerves. These are arranged superficially in the fossa, making them vulnerable to compression or trauma.

The primary nerves include:

  1. Tibial Nerve

The sciatic nerve divides into the tibial and common fibular nerves at the upper angle of the popliteal fossa. The tibial nerve, being the larger branch, travels vertically down the middle of the fossa before entering the posterior compartment of the leg.

It innervates several muscles, including the:

  • Soleus
  • Gastrocnemius
  • Plantaris
  • Popliteus

One of its branches, the medial sural cutaneous nerve, unites with the lateral sural cutaneous branch from the common fibular nerve to form the sural nerve, which supplies the posterolateral aspect of the leg and foot.

  1. Common Fibular Nerve

This nerve courses along the medial border of the biceps femoris before curving around the head and neck of the fibula. Due to its superficial position in this region, it is especially prone to injury. It eventually divides into 2 terminal branches: the superficial and deep fibular nerves.

What are the Blood Vessels of the Popliteal Fossa?

The popliteal artery runs deep in the fossa, giving off the genicular branches that form the knee’s vascular anastomosis. Superficial to it lies the popliteal vein, which becomes the femoral vein after receiving major tributaries.

The vascular structures lie deeper than the nerves, and they include the following:

  1. Popliteal Artery

The popliteal artery represents the continuation of the femoral artery after it exits the adductor hiatus. Within the popliteal fossa, it travels downward and laterally, giving off several branches collectively known as the genicular arteries.

These include:

  • Superior medial genicular artery
  • Superior lateral genicular artery
  • Middle genicular artery
  • Inferior medial genicular artery
  • Inferior lateral genicular artery

These arteries participate in the genicular anastomosis, an elaborate network that ensures continuous blood flow around the knee joint, particularly during flexion. The artery also gives muscular branches to the gastrocnemius, soleus, plantaris, and hamstring muscles.

  1. Popliteal Vein

Lying superficial to the popliteal artery, the popliteal vein forms a part of the deep venous system. As it exits the fossa superiorly, it transitions into the femoral vein. It receives blood from the posterior tibial and peroneal veins as well as the short saphenous vein.

  1. Short Saphenous Vein

This superficial vein ascends along the posterior leg, enters the fossa through the popliteal fascia, and ultimately drains into the popliteal vein. Its course makes it clinically important in venous access and varicose vein assessment.​

What is the Lymphatic Drainage for the Popliteal Fossa?

The popliteal fossa contains superficial and deep lymph nodes. The superficial nodes lie in the subcutaneous tissue and drain the lateral foot and leg via vessels accompanying the short saphenous vein. The deep nodes surround the popliteal vessels and receive lymph from deeper leg and foot structures before draining toward the deep inguinal nodes.

Two groups of lymph nodes are located within the popliteal fossa:

  1. Superficial Popliteal Nodes

Situated within the subcutaneous tissue, they drain lymph from the lateral foot and leg through vessels accompanying the short saphenous vein.

  1. Deep Popliteal Nodes

These nodes surround the popliteal vessels and receive lymph from the deeper structures of the leg and foot. From here, lymph drains toward the deep inguinal lymph nodes.

What is the ​Clinical Relevance of the Popliteal Fossa?

Swelling or pain in the popliteal fossa often results from a Baker’s cyst or a popliteal artery aneurysm. A popliteal aneurysm causes compression of nearby structures, especially the tibial nerve, leading to impaired plantar flexion and sensory changes, often accompanied by a pulsatile mass or bruit.

Swelling or pain in the popliteal fossa can represent a wide range of underlying conditions. Two of the most common causes include:

1. Baker’s Cyst

The popliteal cyst, also known as Baker’s cyst, develops as a result of the enlargement of the semimembranosus bursa, which is frequently caused by chronic inflammation or degenerative changes in the knee joint, such as osteoarthritis.

Even though most cysts spontaneously improve, ruptured Baker’s cysts may be imitations of deep vein thrombosis, and they manifest in the form of calf pain and swelling.

2. Popliteal Artery Aneurysm

A popliteal aneurysm represents a localised dilation of the artery. Due to the non-stretchable nature of the popliteal fascia, any enlargement compresses adjacent structures—particularly the tibial nerve.
Patients may experience:

  • Reduced or absent plantar flexion
  • Numbness or tingling along the foot and posterolateral leg

A pulsatile mass or an audible arterial bruit strongly suggests an aneurysm.

FAQs about the Popliteal Fossa

  1. Which popliteal fossa structure holds the greatest clinical significance?
    The popliteal artery is of paramount importance, as trauma or aneurysmal dilation of this vessel can rapidly compromise perfusion to the lower limb.
  2. Why is the common fibular nerve particularly susceptible to injury?
    Its superficial course around the neck of the fibula renders it highly exposed, predisposing it to injury from fractures, external compression, or even habitual leg-crossing.
  3. How is a popliteal aneurysm generally diagnosed?
    Diagnosis is typically based on the presence of a palpable pulsatile mass, the detection of a bruit on auscultation, and confirmation via Doppler ultrasonography.
  4. What conditions most commonly lead to the formation of Baker’s cysts?
    Baker’s cysts generally arise in the context of chronic intra-articular inflammation, most often associated with osteoarthritis, rheumatoid arthritis, or meniscal pathology.
  5. What is the optimal position for palpating the popliteal artery?
    Palpation is most effective when the knee is gently flexed, a position that brings the artery closer to the surface and facilitates examination.

Conclusion

The popliteal fossa, though often overlooked, is one of the most clinically significant regions of the lower limb. It contains vital nerves, blood vessels, and lymphatics that contribute to the stability, movement, and vascular integrity of the leg.

For MBBS students, mastering the anatomy and the clinical relevance of this region is indispensable. For added guidance, DocTutorials can be your study partner. We offer 3D & 2D animated videos, CBME-based video lectures, and expert mentorship.

Join DocTutorials today and explore our MBBS curriculum to excel in your medical career!

NEET PG Online Live Power Pack
DocTutorials App Download Now

Latest Blogs

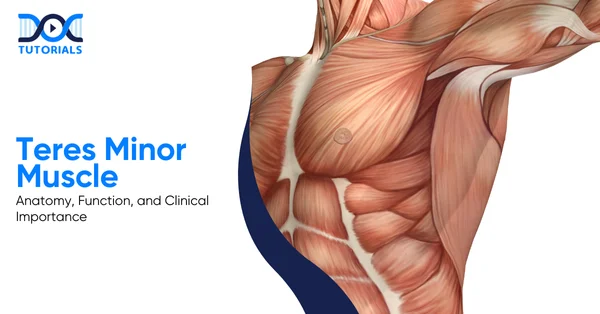
Teres Minor Muscle: Anatomy, Function, and Clinical Importance

Teres Minor Muscle | DocTutorials

The teres minor is the smallest posterior muscle out of the 4 muscles in the rotator cuff (a cluster of four muscles that permits wide mobility of the human shoulder) that connects the scapula to the humerus and primarily assists in external rotation of the arm.

This muscle, although less discussed than other muscles of the rotator cuff, plays a crucial role in stabilising the shoulder, particularly during overhead and rotational movements.

Read below to know more about the anatomy, functions, clinical relevance, and common pathologies of the teres minor muscle in detail.

What is the Teres Minor Muscle and its Anatomy?

The teres minor is a small but essential posterior shoulder muscle that forms part of the rotator cuff and connects the scapula to the humerus. It plays a key role in stabilising the shoulder joint and enabling external rotation and adduction of the arm.

Teres minor is an intrinsic muscle of the shoulder region. It is a crucial part of the rotator cuff muscle group. It is a posterior muscle of the shoulder, which connects the scapula to the humerus.

It, along with other muscles like the supraspinatus, infraspinatus, and subscapularis, helps in controlling shoulder movements. Although it is a small muscle, it cannot be overlooked, since it also plays a prominent role in providing shoulder joint stability.

Rotator muscles of the cuff work cooperatively to hold the head of the humerus fixed inside the glenoid cavity while moving in various directions. Every rotator cuff also has its own set of functions, and among them, the teres minor has its own role in external rotation and adduction of the arm.

What is the Origin of the Teres Minor Muscle?

The teres minor has its origins from the back of the scapula, more precisely from the upper two-thirds part of its lateral border. From there, the muscle fibres turn superolaterally to attach to the greater tubercle on the humerus. The teres minor can cause rotation on the humerus, thus facilitating the control of the movement of the arm.

  • Relations

The teres minor muscle lies superficial to the long head of the triceps brachii and between the large shoulder muscles. The medial aspect of the muscle is partly concealed by the trapezius muscle, and the deltoid muscle covers the superolateral part of the muscle. It relates to the infraspinatus muscle superiorly and to the teres major muscle inferiorly.

As it passes across the shoulder joint, the tendon of teres minor intermingles with the glenohumeral joint capsule on its inferoposterior aspect. This feature is valuable as it stabilises the joint. The muscle also defines the limits of two important axillary spaces.

It forms the superior boundary of the quadrangular space, which carries the axillary nerve and a posterior circumflex humoral artery, and also the superior boundary of the triangular region, through which passes the circumflex scapular artery.

Thus, any injury/compression injury related to this region should not be underestimated because of the critical nerves and blood vessels present.

  • Innervation

The teres minor muscle receives innervation from the axillary nerve, which also innervates the deltoid muscle and derives from nerve roots C5 and C6.

As the teres minor and deltoid muscles share a common nerve, injury to the former may compromise the stability or rotation of the shoulder joint, making weakness of the external rotation an important point not to miss during clinical examination.

  • Blood Supply

The supply of the teres minor muscle is from the circumflex scapular and posterior circumflex humoral arteries.

These arteries provide sufficient supply to this muscle so that it can carry out its roles in stabilising and rotating the shoulder joint during regular movements.

What is the Function of the Teres Minor Muscle?

The teres minor muscle has a major role in shoulder stability as well as shoulder movements. This muscle, together with all the rotator cuff muscles, is associated with shoulder joint stability, as well as maintaining the head of the humerus within a stable position in the glenoid cavity.

The functions of the teres minor muscle are explained in detail below:

1. Shoulder Stability

The muscle forms a functional musculotendinous unit that surrounds the shoulder joint like a sleeve. They work independently to produce specific movements. When they work together, they form a mechanism called concavity compression.

This compresses the humeral head into the glenoid fossa, thereby preventing dislocation. The teres minor supports the posterior aspect of the joint. Thus, the teres minor prevents the posterior displacement of the humeral head.

Without these supports, the shoulder cannot stabilise during the rapid movements that involve elevating the limbs.

2. External Rotation of the Arm

In the anatomical position, the teres minor is a lateral rotator of the shoulder joint. It assists in pulling the greater tubercle posteriorly, along with infraspinatus, in bringing about the rotation of the arm externally.

This is significant because it assists with shoulder functions and exerts force during the pre-load phase of throwing. The muscle contracts eccentrically at the end of this process so that the limb will not suddenly drop.

3. Arm Adduction

When the arm is lifted, the action of arm adduction is aided by the teres minor. Along with the latissimus dorsi and pectoralis major, the teres major assists in lowering the arm from an abducted position.

Clearly, this movement has particular significance in overhead activities and movements such as pulling or throwing, where controlled adduction of the arm helps in efficiently completing these acts.

What are the Pathologies Related to the Teres Minor Muscle?

Pathologies involving the teres minor muscle are relatively uncommon when compared with other muscles of the rotator cuff. However, in the context of an injury, shoulder stability and external rotation are greatly compromised.

The teres minor muscle hasn’t garnered much attention in the context of related pathologies. This is primarily because tears involving the teres minor are far less frequent than those affecting the supraspinatus, infraspinatus, or subscapularis muscles.

Additionally, the teres minor can be involved in specific cases of shoulder denervation injuries, a condition we’re still learning about.

  • Tears of the Teres Minor

Tears of the teres minor generally occur as part of large or massive rotator cuff tears involving multiple tendons. With failure of other rotator cuff tendons, the remaining muscles are exposed to increased mechanical stress, and thus, the teres minor might tear either insidiously or after acute trauma.

These tears can involve the muscle belly, tendon, or the broad muscular attachment to the proximal humerus, and they often present with teres minor pain during shoulder movement. Traumatic tears may also result from shoulder dislocation or subluxation, especially posterior shoulder instability.

In these situations, injury to the teres minor is often linked with posterior capsular disruption and posterior labral tears. Isolated teres minor tears do occur, but are less frequent; most commonly to posterior shoulder trauma.

Diagnosis of this problem is sometimes difficult, and cannot be based on the appearance of the tendon alone, as the tendon may be intact while the muscle belly is torn.

  • Injuries with Shoulder Dislocation

Although anterior shoulder dislocation is more common, the association between injury to the teres minor and posterior shoulder dislocation or subluxation has been well established. Posterior instability events have been documented in studies to involve both the teres minor and the posterior capsule frequently.

In many patients, injury to the teres minor can occur in the absence of injury to other rotator cuff tendons and thus necessitates clinically generated suspicion. These injuries typically have posterior shoulder pain and weakness in external rotation.

Given that posterior instability is not always clinically evident, imaging is highly important for delineating these injury patterns.

  • Denervation Injuries of the Teres Minor

Denervation injury to the teres minor is more common than structural tears. Denervation, often related to axillary nerve injury, is frequently seen on MRI (magnetic resonance imaging) and, depending on the stage of injury, may manifest as musoedema or fatty atrophy.

This has been attributed to quadrilateral space syndrome, in which the axillary nerve is compressed in the quadrilateral space. However, isolated denervation of the teres minor has now been increasingly recognised as a separate entity.

This occurs because the nerve branch to the teres minor follows a vulnerable course along the joint capsule and inferior glenoid rim. This nerve branch can be injured by trauma, repetitive microtrauma from overhead activity, or glenohumeral instability and still spare the deltoid muscle.

The absence of involvement of the deltoid does not exclude a nerve-related pathology.

What are the Clinical Tests for the Teres Minor Muscle?

The tear in the teres minor muscle needs to be evaluated carefully, as its function is important for shoulder joint function. Although imaging studies can help to some extent, they may not always give correct results; thus, clinical examinations remain important and cannot be ignored altogether.

The teres minor should be assessed in patients with massive rotator cuff tears because its integrity strongly influences shoulder function and surgical outcomes. Imaging is helpful, but not always reliable.

Clinical examination still matters in many regards, especially when considering management options. Various tests are used in practice; however, their accuracy varies. 

The following table provides a quick overview of the most appropriate clinical tests for assessing the function of the teres minor:

Clinical TestHow the Test is PerformedWhat a Positive Test MeansClinical Relevance
External Rotation Lag Sign (>40°)Patient sits with elbow flexed to 90° and shoulder slightly elevated in the scapular plane.
• The examiner places the arm in near-maximal external rotation and asks the patient to hold it.
Inability to maintain position with a lag >40°• Most accurate test for teres minor insufficiency.
• High specificity and sensitivity, hence strongly predictive of dysfunction.
Drop Sign• Arm abducted to 90° in the scapular plane, elbow flexed to 90°, shoulder externally rotated to 90°.
• The patient is asked to hold the position against gravity.
Arm drops into internal rotation.• Useful for assessing posterosuperior cuff function.
• Also helps identify the teres minor weakness when the infraspinatus is compromised.
Patte Test• The arm was abducted to 90° in the scapular plane with the elbow flexed.
• Patient performs external rotation against resistance.
External rotation strength < MRC Grade 4Only test that specifically helps isolate the teres minor strength, especially when the infraspinatus is deficient.
Hornblower’s Sign• Arm elevated to 90° in the scapular plane, elbow flexed.
• Patient attempts resisted external rotation (forming a “field-goal” position).
Inability to externally rotateSuggests teres minor tear or dysfunction. Often used as a quick screening tool.

FAQs about the Teres Minor Muscle

1. What conditions frequently affect the teres minor muscle?

Rotator cuff tears, tendinitis, and shoulder impingement syndrome may also affect the teres minor. It might also be involved in quadrangular space syndrome due to compression of the axillary nerve or posterior circumflex humoral artery.

These conditions more often than not present with shoulder pain and weakness, especially with overhead activities.

2. What is the primary function of the teres minor muscle?

It externally rotates the arm at the shoulder joint. The teres minor also assists in stabilising the humeral head within the glenoid cavity, especially during movements that involve medial rotation.

3. What nerve provides innervation to the teres minor muscle?

The teres minor is innervated by the axillary nerve. This arises from the posterior cord of the brachial plexus. It passes through the quadrangular space before supplying the muscle.

4. What blood vessels supply the teres minor muscle?

Teres minor is supplied by the circumflex scapular artery and by the posterior circumflex humeral artery. Both arteries arise from branches of the axillary artery. These vessels pass through defined anatomical spaces near the muscle.

5. How is an injury to the teres minor clinically evaluated?

Hornblower’s sign is utilised to examine the function of the teres minor. The test is considered positive when the patient is unable to externally rotate the shoulder against resistance, thus indicating possible pathology of the teres minor or its involvement in the rotator cuff.

Conclusion

The teres minor muscle is a small but functionally important part of the rotator cuff, contributing to shoulder stability, external rotation, and controlled arm movements. Having a detailed knowledge of the teres minor is essential for MBBS students, as it forms an important basis for evaluating rotator cuff pathology and shoulder dysfunction.

To understand such clinically important anatomy concepts with ease, DocTutorials can be your learning partner. We provide 3D video explanations and structured expert mentorship, and CBME-based video lectures to help MBBS students understand the concepts.

Join DocTutorials today, and explore our MBBS curriculum to excel in your medical career!

NEET PG Online Live Power Pack
DocTutorials App Download Now

Latest Blogs

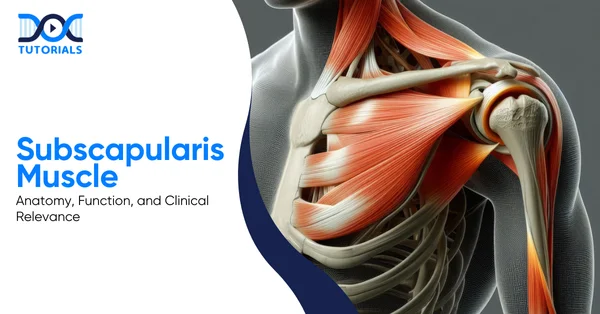
Subscapularis Muscle: Anatomy, Function, and Clinical Relevance

Subscapularis Muscle | DocTutorials

The subscapularis muscle is a very strong and important, though often neglected, portion of the rotator cuff; it is integral to the movement and stabilisation of the shoulder. One important fact is that it’s the only rotator cuff muscle responsible for internal rotation; thus, even a minor injury disrupts regular arm movement.

Understanding of the subscapularis is important for MBBS students, as it relates core anatomy to commonly recommended clinical tests, imaging, and shoulder pathologies in both exams and practice. Throughout this guide, we detail the anatomy, functions, pathologies, and clinical relevance of the subscapularis muscle. 

Keep reading!

What is the Subscapularis Muscle?

The subscapularis is a broad anterior shoulder muscle. It is also a prominent rotator cuff muscle. It is involved in stabilising the head of the humerus. The action of this muscle is unique and powerful, so it cannot be compared with the rest of the cuff muscles. Therefore, it must be tested separately because of the importance of its role in the shoulder joint stabilisation function.

The subscapularis is a broad, triangular muscle of the shoulder. The muscle is located on the anterior or costal surface of the scapula, where it attaches this bone to the humerus. As part of the rotator cuff muscles, which include supraspinatus, infraspinatus, and teres minor, this muscle is very important in maintaining shoulder stability.

The rotator cuff muscles coordinate to stabilise and assist in guiding the humeral head into the glenoid cavity during upper limb movement. However, the action of the subscapularis muscle is unique and powerful; therefore, it should be tested individually during a clinical assessment.

What is the Anatomy of the Subscapularis Muscle?

The subscapularis is the largest muscle in the rotator cuff and is triangular in shape. It has a close association with the axilla, nerves, blood vessels, bursae, and shoulder joint. Additionally, it has an extensive attachment, a strong tendon inserting into the lesser tubercle, a close association with the teres major, and innervation from C5-C6 and axillary roots.

The anatomy of the subscapularis muscle is explained in the sections below: 

Shape and Location

The subscapularis is a strong and triangular muscle in shape, which fills in completely the subscapular fossa of the scapula. It lies posterolateral to the thoracic cage and forms a major part of the posterior wall of the axilla. Since it is so large, it is considered the largest and most powerful muscle of the rotator cuff.

Origin

The subscapularis originates from:

  • The medial two-thirds of the subscapular fossa on the anterior surface of the scapula
  • Tendinous intramuscular septa along the ridges of the fossa
  • An aponeurosis covering the posterior surface of the lateral third of the muscle

Therefore, its origin is broad and able to generate a strong force.

Insertion

The muscle fibres converge laterally to form a thick, rounded tendon. This tendon:

  • Inserts on the lesser tubercle of the humerus
  • Blends with the anterior part of the glenohumeral joint capsule
  • The tendon, near its insertion, is continuous with the tendon of the teres major 

Since the two muscles also share somewhat similar actions and innervation, they are often considered as a functional unit.

A large subscapular bursa, which communicates with the shoulder joint, separates the tendon from the neck of the scapula. This reduces friction; hence, smooth movement is possible.

Relations

The subscapularis forms important anatomical relations; hence, it cannot be ignored in any examination:

  • Anteriorly: Faces the contents of the axilla
  • Superolaterally: Covered by serratus anterior
  • Inferomedially: The relation of coracobrachialis and biceps brachii
  • Centrally: Crossed by cords of the brachial plexus, axillary nerve, axillary artery, and vein

Its posteriorly blending tendon inserts into the fibrous capsule of the shoulder joint and continues with other tendons of the rotator cuff, forming the rotator cuff capsule.

The subscapularis also forms the boundaries of major axillary spaces:

  • Quadrangular space
  • Upper triangular space
  • Lower triangular space, also known as the triangular interval

Since these areas transmit major nerves and vessels, trauma or inflammation within this space has the potential to cause significant complications.

Innervation

The muscle is supplied by:

  • Upper subscapular nerve
  • Lower subscapular nerve

Originating from the posterior cord of the brachial plexus, both nerves carry fibres from C5–C6. The upper nerve supplies the upper part, and the lower nerve supplies the lower part of the muscle. In case of injury to these nerves, internal rotation strength won’t be normal.

Blood Supply

Blood supply is mainly derived from branches of the subclavian system:

  • Subscapular artery (branch of axillary artery)
  • Axillary artery
  • Suprascapular artery

Adequate blood supply is important; compromised vascularity will negatively impact tendon healing efficiency.

Lymphatic Drainage 

Clinically, lymph from the subscapularis muscle flows into the axillary lymph nodes, important during infections or malignancy spread.

What Are the Functions of the Subscapularis Muscle?

The subscapularis primarily produces internal rotation of the shoulder. The action of adduction of the joint also receives a certain amount of assistance from it, so actions such as reaching, walking, or reaching overhead would not be possible without the aid of this muscle. Also, it stabilises the humeral head by compressing the concavity, and if this ligament isn’t functioning properly, shoulder movement will not be normal, as the stability would be missing.

The subscapularis muscle functions are explained below: 

Primary Function: Internal (Medial) Rotation

The major role of the subscapularis muscle is to internally rotate the arm at the glenohumeral joint:

  • Medially rotates the humeral head in the glenoid fossa
  • Engages actions such as reaching across the body and arm swing in walking
  • Can work effectively in different arm positions, including overhead positions

As no other rotator cuff muscle assists in this action, a loss of function in this muscle leads to a weak internal rotation. Therefore, this action is strongly emphasised in both evaluation and rehabilitation.

Adduction of the Arm

To a lesser degree, the subscapularis muscle helps in the addition of the arm:

  • Draws the arm towards the body’s midline
  • Acts in conjunction with internal rotation
  • The sequence of rotation, followed by adduction, is a common sequence observed in normal arm movement during walking.

Otherwise, this is a subtle but important function, since everyday gestures do not exist in isolation.

Shoulder Stability and Concavity Compression

Apart from movement, another role of the subscapularis muscle is to provide stability to the shoulder joint:

  • This assists in concavity compression, which pushes the humeral head into the glenoid cavity
  • Stabilises and prevents anterior and superior migration of the humerus
  • Teaming with other rotator cuff muscles in opposition to the translating forces

But this function assumes a very important role when you do overhead work. When it comes to using heavy muscles such as the deltoid, pectoralis major, biceps, and triceps, this muscle prevents dislocation of the head of the humerus in an upward direction. But in these very functions, this particular muscle is most liable to impingement.

Shoulder and Scapular Movements Coordination

The subscapularis muscle is also responsible for the coordination of movement between the glenohumeral joints and scapulothoracic joints:

  • Facilitates scapular motion to parallel shoulder movements
  • Enables actions such as reaching for objects placed above
  • Acting in coordination with the back muscles, which mainly regulate scapular movement 

Owing to this function, shoulder motion will not have a fluid appearance if the subscapularis is not working properly.

The summary of the functions of the subscapularis muscle is given below in this table: 

FunctionRole of the Subscapularis Muscle
Internal RotationPrimary and exclusive rotator cuff action
Arm AdductionAssists movement toward the body
Joint StabilityPrevents dislocation via concavity compression
Movement CoordinationLinks glenohumeral and scapulothoracic actions

What Are the Pathologies Related to the Subscapularis Muscle?

Subscapularis pathologies include trigger points, tendonitis, and tendon tears, also causing referred pain, weakness, and limited internal rotation, so shoulder function cannot remain normal. Since the tendon endures high mechanical stress, overuse or trauma may lead to tears and instability; hence, early diagnosis and treatment are vital because symptoms won’t settle if ignored. 

Common pathologies associated with the muscular part of the subscapularis include overuse, degeneration, and traumatic injuries. Given the important role played by this muscle during rotation and stabilising functions of the shoulder joint, pathologies can have a marked impact on everyday functions.

Myofascial Trigger Points

The infraspinatus muscle can have myofascial pain sites, which most likely arise because of overuse. The subscapularis may have up to three trigger points. The common sites tend to be in the area towards the outer edge of the muscle. 

Referred pain is usually perceived in:

  • Posterior shoulder
  • Shoulder blade area
  • Back of the upper arm

In certain instances, a characteristic pain pattern may appear in a band form around the wrist. Wrist pain may be attributed by patients, but they do not connect it with a shoulder problem.

Subscapularis Tendonitis and Overuse Injuries

Subscapularis tendonitis can be common in people in jobs that involve constant overhead or throwing motions.

Common characteristics include:

  • Pain and tenderness at the tendon insertion in the inner upper arm.
  • Worsening pain with raising an arm above the level of the shoulder.
  • Discomfort during shoulder movement.

An overworked subscapularis can also present with a feeling of heavy arm or difficulty in lifting the arm. In other instances, it can present with a frozen shoulder because pain limits movement.

Subscapularis Muscle Tear

Subscapularis tendon tears can be considered a serious type of rotator cuff damage because they impact both internal rotation and anterior shoulder stability. The subscapularis tendon is considered to be the largest and most powerful among all rotator cuff muscles. 

As a consequence, heavy mechanical pressure is imposed on this tendon, especially in overhead and throwing motions. Tearing can be a consequence of acute trauma, overuse, and/or degeneration in elderly people. 

Most tears affect the part where this tendon attaches to the humerus. Additionally, they can relate to biceps tendon diseases.

AspectDescription
Common CausesTrauma or overextension (younger individuals); age-related degeneration (older individuals); chronic overuse; shoulder impingement
Site of TearUsually near the tendon insertion on the lesser tubercle of the humerus
General SymptomsAnterior shoulder pain; pain worsening at night; shoulder or arm weakness; pain during arm elevation
Specific Clinical SignsDifficulty reaching behind the back or into the back pocket; biceps weakness; pain beneath the clavicle; passive outward rotation of the arm without voluntary control
Associated FindingsClicking or catching sensation during shoulder rotation; possible biceps tendon involvement
Clinical TestsLift-off test; Bear hug test; Belly press test
ImagingMRI (confirms diagnosis and assesses size and severity of tear)
Conservative TreatmentRest; activity modification; ice or heat; NSAIDs; physiotherapy (preferred for small tears with minimal functional loss)
Surgical TreatmentArthroscopic repair for full-thickness tears or when symptoms haven’t improved after 3–6 months of conservative care
ComplicationsTear progression; muscle atrophy; increased stress on other rotator cuff muscles; secondary biceps pathology
PrognosisGenerally good; most patients regain near-normal shoulder function with appropriate treatment and rehabilitation

What Are the Tests for the Subscapularis Muscle? 

The integrity of the subscapularis is tested with the lift-off, bear hug, and belly press tests, as they emphasise internal rotation strength. Therefore, general rotator cuff testing is not adequate. The impairment in these tests is an indication of tendon dysfunction or tear, and early recognition helps in conservative management.

Clinical tests are essential for assessing the integrity and function of the subscapularis muscle, especially when a subscapularis muscle tear or dysfunction is suspected. These tests mainly evaluate internal rotation strength and help differentiate a torn subscapularis muscle from other rotator cuff pathologies.

Lift-Off Test (Gerber’s Test)

The “lift-off” test, first described by Gerber and Krushell in 1991, is one of the earliest tests and most specific for dysfunction of the subscapularis.

The patient is placed in a standing position, with a request to put the hand behind the back and place the dorsum of the hand over the middle part of the lumbar region. Then, the patient is asked to raise the hand away from the back by rotating the humerus maximally inwards and extending the shoulder.

The indication of a normal test is the capacity to actively raise the dorsum of your hand away from your back.

An abnormal test occurs when the patient can’t lift the hand away, which suggests subscapularis rupture or dysfunction. This usually points toward a significant or complete tear, hence it’s considered highly specific.

Bear Hug Test

The bear hug test is very helpful in assessing a partial tear of the subscapularis tendon.

To carry out this test, the patient holds the palm of the affected side on the shoulder opposite to it, with the elbow in front of the body. The patient is asked to hold this position while a rotational force is applied to the forearm by the examiner.

The test will be considered positive if the patient is unable to do this or if they have weak internal rotation when compared to the other side. This will reveal a tear in, or a weakening of, the subscapularis muscle. Additionally, this particular test will be simpler in patients with difficulty bringing their hands behind their backs.

Belly Press Test

Another assessment is the belly press test, which is especially relevant in circumstances where shoulder mobility is poor.

In this position, the patient’s affected limb is placed on the side with the arm bent at a 90-degree angle at the shoulder. The patient’s palm is placed on the stomach, and they are asked to press it against the stomach through internal rotation.

The test is positive if the patient shows weakness compared to the opposite side or compensates by extending the elbow or shoulder instead of internally rotating the arm. This compensation occurs because the subscapularis isn’t functioning properly, therefore indicating a tear or dysfunction.

After identification of a tear or tendinopathy in the subscapularis muscle, treatment will depend on the level of damage. Subscapularis tendonitis and tendinopathy of the subscapularis tendon can be successfully managed with non-operative methods, which include rest, modification of activity, pain medication, application of ice, and rehabilitation exercises. 

Applying ice can help to ease pain and reduce inflammation. Therefore, it is a common treatment in the early stages.

FAQs about the Subscapularis Muscle

  1. What is a subscapularis muscle tear?

A torn subscapularis muscle is an injury to the tendon of the subscapularis muscle, which attaches to the lesser tuberosity of the humerus. Such a tear can be partial or a full-thickness tear, which means a tear in part of the tendon or in the whole tendon. Such an injury can come about due to overuse, trauma, or degeneration.

  1. Why is the subscapularis important in shoulder stability?

As the subscapularis wraps around the front part of the shoulder joint and attaches to the humerus, this muscle assists in keeping the head of the humerus in the glenoid cavity of the scapula. In this particular function, it is termed concavity compression, where it presses the head into its socket to keep it from dislocation.

  1. What clinical problems can affect the subscapularis muscle?

The subscapularis can be affected in the following conditions:

  • Tendinopathies or overuse injuries, especially in throwers
  • Trigger points that produce referred pain in the shoulder region
  • Partial or complete tears of the tendon, especially in the region around the humeral attachment.

Such issues can lead to a weakness in internal rotation, pain in the shoulder joint, and functional impairment. Tearing and tendinosis are usually assessed via tests and imaging studies.

  1. How is the subscapularis muscle supplied with nerves and blood?

The subscapularis receives its nerve supply from the upper and lower subscapular nerves, which are derived from the posterior cord of the brachial plexus. The blood supply can be traced to various branches of the axillary artery, which include the subscapular and suprascapular arteries.

  1. What are the main functions of the subscapularis muscle?

Its main function is the medial rotation of the arm, which means rotating the arm towards the mid-plane of the body. Medial rotation of the arm is very important in a lot of functions, such as reaching across the chest or holding up a load above the head. Secondly, this muscle assists in maintaining the head of the humerus in the scapular socket to prevent it from coming out of place during a movement. To a smaller degree, it assists in the adduction of the arm to bring it towards the side of the body.

Conclusion

Given the significance of the subscapularis muscle in supporting rotation and stability in the shoulders, any damage to this part can have a great impact on upper limb functions. For MBBS students, the relevance of the subscapularis lies in its connection with different aspects of medicine. 

An understanding of this topic can help in comprehending rotator cuff tears, shoulder pain, and correlations during examinations. Hence, it can in no way be overlooked when learning or during testing.

DocTutorials assists medical students with high-yield video lectures, Qbanks, and revision programmes, which help students master difficult topics quickly. Additionally, it assists in filling the gap between learning and application in medical studies.

Check out our MBBS courses today!

NEET PG Online Live Power Pack
DocTutorials App Download Now

Latest Blogs

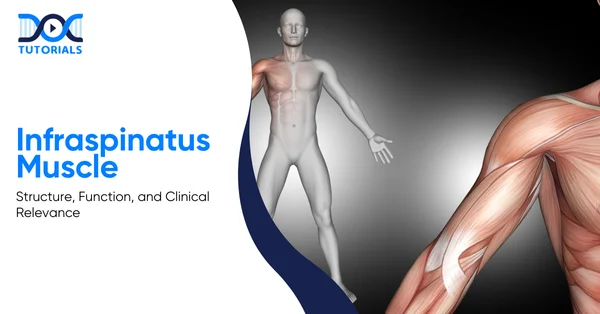
Infraspinatus Muscle: Structure, Function, and Clinical Relevance

Infraspinatus Muscle | DocTutorials

The infraspinatus muscle is a vital stabiliser and functional powerhouse of the shoulder joint, forming an integral part of the rotator cuff complex. The anatomy and action of the infraspinatus, along with its clinical implications, form a solid foundation for medical students, both for exams and future clinical practice.

Although small in size compared to larger back and shoulder muscles, its contribution to upper-limb mobility and shoulder joint stability is immense. Keep reading to learn about the infraspinatus muscle, its structure, functions, clinical significance, and more.

What is the Infraspinatus Muscle?

The infraspinatus is one of the most important rotator cuff muscles, which primarily manage external rotation and stabilise the shoulder joint. It originates from the infraspinous fossa and inserts on the greater tubercle of the humerus, playing a vital role in the upper-limb biomechanics.

The infraspinatus is a thick, triangular muscle occupying most of the infraspinous fossa of the scapula and forming an integral part of the rotator cuff. With the supraspinatus, teres minor, and subscapularis, it acts to stabilise the glenohumeral joint.

It is inserted onto the middle portion of the greater tubercle of the humerus, and its innervation is via the suprascapular nerve (C5–6). The suprascapular and circumflex scapular arteries provide blood to it, and its primary function is external rotation of the humerus and assisting in shoulder stability.

What is the Anatomy of the Infraspinatus Muscle?

The infraspinatus is one of the most important rotator cuff muscles, which primarily manage external rotation and stabilise the shoulder joint. It originates from the infraspinous fossa and inserts on the greater tubercle of the humerus, playing a vital role in the upper-limb biomechanics.

The following points break down the anatomy of the infraspinatus muscle:

  • Location and General Structure

The infraspinatus muscle is a thick, triangular muscle that covers most of the infraspinous fossa on the posterior surface of the scapula.

It is one of the four rotator cuff muscles—along with supraspinatus, teres minor, and subscapularis—and plays a major role in stabilising the glenohumeral joint.

  • Origin

It originates from the medial two-thirds of the infraspinous fossa, including fleshy fibres from the fossa itself and tendinous fibres from the ridges running across it.

Additional fibres arise from the infraspinatus fascia, which also separates it from the teres major and teres minor muscles.

  • Insertion and Tendon Pathway

The muscle fibres converge into a narrow tendon that crosses the posterior part of the shoulder joint capsule. This tendon inserts onto the middle facet of the greater tubercle of the humerus and partially blends with the posterior shoulder capsule.

  • Anatomical Relations

The infraspinatus is located deeper into the trapezius and portions of the deltoid and latissimus dorsi. It sits inferior to the supraspinatus and superior to the teres major and minor. As they are separated only by the scapular spine, the supraspinatus and infraspinatus often behave as a functional unit.

  • Bursa and Surrounding Structures

In some individuals, a small bursa lies between the infraspinatus tendon and the shoulder capsule. This bursa may communicate with the glenohumeral joint cavity, facilitating smooth tendon movement during shoulder rotation.

  • Innervation

The muscle is innervated by the suprascapular nerve (C5–C6), originating from the superior trunk of the brachial plexus. The nerve passes through the scapular notch, supplying both supraspinatus and infraspinatus before giving articular branches to the shoulder capsule.

  • Blood and Lymphatic Supply

Arterial supply comes from the suprascapular artery and the circumflex scapular arteries. Lymphatic drainage primarily occurs through the subscapular (posterior) axillary nodes, which are a crucial group in the lymphatic pathways of the shoulder area.

  • Infraspinatus Muscle Action

The infraspinatus is the primary external rotator of the humerus and is crucial for maintaining glenohumeral joint alignment during movement.

Working with the teres minor and the rest of the rotator cuff, it prevents upward displacement of the humeral head. It also contributes to posterior shoulder stability, assists in extension, and helps abduct the inferior angle of the scapula when the arm is fixed.

What are the Functions of the Infraspinatus Muscle?

As a key rotator cuff muscle, the infraspinatus muscle maintains humeral head alignment while enabling efficient rotational and overhead actions. It’s coordinated activity with surrounding muscles ensures smooth, powerful, and safe shoulder mechanics.

Following is a breakdown of the functions of the infraspinatus muscle into clear, captioned explanations for better understanding and MBBS-level retention:

  • Glenohumeral Joint Stabilisation

The infraspinatus acts as part of the rotator cuff musculotendinous unit to maintain the humeral head centralised within the glenoid cavity. It inserts its tendon into the fibrous capsule of the shoulder, contributing to the formation of the rotator capsule.

This provides a concavity compression mechanism that compresses the humeral head into the glenoid fossa and prevents dislocation. This stabilising effect ensures seamless arm movement.

  • External (Lateral) Rotation of the Humerus

The infraspinatus muscle creates strong lateral rotation at the shoulder joint and is considered to be the primary external rotator. This movement is important in activities that require backward extension and preloading of the upper limb, such as throwing or overhead hitting.

Its mechanical axis, in conjunction with its large humeral footprint, makes it one of the most powerful contributors to external rotation, working synergistically with the teres minor.

  • Control of Humeral Head Position During Abduction

During abduction of the shoulder, an upward pull on the humeral head is provided by the deltoid. The infraspinatus provides a downward and stabilising force in cooperation with the teres minor, thus preventing upward migration and impingement against the coracoid process.

While the supraspinatus acts to some degree, it is not known precisely to what extent, so the infraspinatus-teres minor pair constitutes the principal stabilisers for this action.

  • Anterior–Posterior Force Balance

The infraspinatus provides the posterior stabilising force in the glenohumeral joint, balancing the anterior pull of the subscapularis. These muscles, together, prevent anterior or posterior translation of the humeral head and allow coordinated, effective shoulder movements.

A deficiency or tear in the infraspinatus would disrupt the balance and often result in the elevation of the humeral head, coupled with the reduced effectiveness of deltoid-driven abduction.

  • Eccentric Control During Overhead Movements

During overhead actions at high velocity, such as throwing, the infraspinatus contracts eccentrically to decelerate the arm and prevent excessive internal rotation. This fine-tuned braking function protects the shoulder against injury and ensures smooth termination of powerful movements.

  • Contribution to Scapular Motion (Scaption)

When the shoulder is in anatomical position, the infraspinatus assists in the abduction of the scapula’s inferior angle, providing a motion described as scaption. This action increases scapular mobility, allowing full shoulder abduction by optimising the position and movement of the scapulothoracic joint.

  • Role in the Rotator Cuff Force-Couple System

The muscles of the rotator cuff are nonlinear, viscoelastic tendons capable of producing balanced opposing forces around the shoulder. The infraspinatus contributes to this dynamic force-couple system through its collagen-rich tendon and its alignment with the other cuff muscles. This ensures optimal biomechanics during complex, multi-plane shoulder actions.

  • Support in the Movements of Shoulder Extension

Although this is not a ‘prime’ extensor, the infraspinatus assists in shoulder extension by providing a supportive backward force that helps coordinate posterior chain actions, involving the latissimus dorsi and posterior deltoid, when external rotation is combined with retraction movements.

FAQs about the Infraspinatus Muscle

  1. What is the primary function of the infraspinatus muscle?

The infraspinatus, as a rotator cuff muscle, plays a crucial role in shoulder movement and contributes to glenohumeral stability. It exerts compression on the humeral head, which facilitates the stabilisation of the humeral head during shoulder abduction.

  1. Which nerve is responsible for controlling the infraspinatus muscle?

The suprascapular nerve provides both motor and sensory innervation. Its motor function targets the supraspinatus and infraspinatus muscles.

  1. Is it necessary to stretch the infraspinatus muscles?

Yes, individuals need to stretch their infraspinatus muscles to keep shoulder injuries at bay.

  1. What are the injuries that can affect the infraspinatus?

The infraspinatus muscle can be injured through activities that involve repetitive overhead, overloading of the shoulder, or even episodes of shoulder instability.

Most cases of overuse in tennis, swimming, baseball, and volleyball result in strains or partial tears of the tendon. Chronic mechanical irritation or degeneration of the infraspinatus might also arise in individuals with heavy manual work.

  1. What is infraspinatus muscle pain?

Infraspinatus muscle pain is a type of discomfort that occurs at the back or top of the shoulder and may radiate towards the front and side of the upper arm or shoulder blade. This discomfort can worsen if left untreated.

Conclusion

The infraspinatus muscle is a structure of immense functional and clinical importance, especially for medical students studying musculoskeletal anatomy and shoulder biomechanics.

Understanding its anatomy, action, nerve supply, and clinical relevance not only improves academic scores but also lays a foundation for sound clinical decision-making in the future. For added guidance, DocTutorials can be your study partner. We offer 3D animated video lectures, structured mentorship by experts, and much more.

Join DocTutorials today and explore our MBBS curriculum to excel in your medical career!

NEET PG Online Live Power Pack
DocTutorials App Download Now

Latest Blogs

Urea Cycle Steps: Mechanism, Regulation, and Clinical Significance

Urea Cycle Steps | DocTutorials

The urea cycle is a fundamental metabolic pathway that detoxifies ammonia, a byproduct of protein metabolism, by converting it into urea for safe excretion. Having comprehensive knowledge of this cycle is crucial for a medical student as it bridges biochemistry, physiology, and clinical medicine.

From the liver’s organ-level role to the molecular interplay among enzymes, the urea cycle is essential to mastering nitrogen metabolism and related disorders. Let’s explore the overview of this cycle, its step-by-step mechanism, and regulation.

Keep reading to learn more.

Urea Cycle: An Overview

The urea cycle is a biochemical pathway in the liver that converts toxic ammonia into urea for safe excretion. The cycle involves cooperation between mitochondrial and cytosolic enzymes for the detoxification of waste nitrogen.

The urea cycle, also known as the ornithine cycle, is a sequence of biochemical reactions in the liver in which highly toxic ammonia, produced by amino acid breakdown, is converted to urea, a safe, water-soluble compound excreted via the urine.

First described by Hans Krebs and Kurt Henseleit in 1932, it operates principally in periportal hepatocytes, using both mitochondrial and cytosolic enzymes. Since mammals and amphibians cannot excrete ammonia directly, this pathway is paramount in preventing nitrogen toxicity.

The cycle is irreversible and requires ATP (adenosine triphosphate). The key enzymes involved include CPS-I, ornithine transcarbamylase, argininosuccinate synthetase, argininosuccinate lyase, and arginase.

What are the Steps of the Urea Cycle?

The urea cycle consists of five enzymatic steps that convert toxic ammonia into urea for safe excretion. It starts in the mitochondria and concludes in the cytosol of liver cells. Knowledge of these steps is important for MBBS students to master the biochemical basis of nitrogen detoxification.

The urea cycle is a five-step biochemical pathway in hepatocytes that detoxifies ammonia by converting it into urea. The steps are discussed below:

  • Step 1: Formation of Carbamoyl Phosphate (Mitochondria)

Ammonia, CO₂, and 2 ATP combine to form carbamoyl phosphate, catalysed by Carbamoyl Phosphate Synthetase I (CPS-I). It requires N-acetylglutamate (NAG) as an essential activator.

Reaction: NH₃ + CO₂ + 2ATP → Carbamoyl phosphate + 2ADP + Pi

  • Step 2: Formation of Citrulline (Mitochondria → Cytosol)

Carbamoyl phosphate transfers its carbamoyl group to ornithine, forming citrulline, catalysed by Ornithine Transcarbamylase (OTC). Citrulline is then transported into the cytosol by ornithine translocase.

Reaction: Carbamoyl phosphate + Ornithine → Citrulline + Pi

  • Step 3: Formation of Argininosuccinate (Cytosol)

Citrulline condenses with aspartate in an ATP-dependent reaction catalysed by Argininosuccinate Synthetase. This adds the second amino group to urea.

Reaction: Citrulline + ATP + Aspartate → Argininosuccinate + AMP + PPi

  • Step 4: Cleavage to Arginine and Fumarate (Cytosol)

Argininosuccinate Lyase splits argininosuccinate into arginine and fumarate. Fumarate enters the TCA cycle, linking the two pathways.

Reaction: Argininosuccinate → Arginine + Fumarate

  • Step 5: Formation of Urea and Regeneration of Ornithine (Cytosol)

Arginase hydrolyses arginine to produce urea and ornithine. Ornithine re-enters the mitochondria to restart the cycle.

Reaction: Arginine + H₂O → Urea + Ornithine

Overall Reaction of the Urea Cycle

NH₃ + CO₂ + Aspartate + 3 ATP + H₂O →

Urea + Fumarate + 2 ADP + Pi + AMP + PPi

What is the Significance of the Urea Cycle?

The urea cycle is essential for detoxifying ammonia, a highly toxic by-product of protein metabolism. Its proper functioning prevents hyperammonemia and maintains metabolic balance. Understanding the importance of the urea cycle helps explain its clinical consequences and the associated disorders resulting from enzyme deficiencies.

The urea cycle is critical for maintaining nitrogen balance and preventing toxic accumulation of ammonia in the body. Mentioned below are the key reasons why it is so important:

  • Ammonia Detoxification: Highly toxic ammonia is converted into urea, thus preventing accumulation and protecting the brain and other organs from irreversible damage.
  • Major Pathway for Nitrogen Excretion: Accounts for almost 80% of nitrogenous waste excretion, ensuring nitrogen is eliminated safely through urine.
  • Prevention of Hyperammonemia: A functional cycle prevents dangerous conditions such as hyperammonemia. This condition can lead to vomiting, lethargy, coma, convulsions, and even death in newborns.
  • Clinical Relevance of Enzyme Deficiencies: Deficiencies in key enzymes (CPS-I, OTC, ASS, ASL, or arginase) result in urea cycle disorders, which are often misdiagnosed as septicemia and treated with unnecessarily high doses of medication.
  • Support for Biosynthesis: Provides intermediates necessary for the recycling of TCA cycle components, amino acids, and keto acids, thereby linking energy metabolism with nitrogen metabolism.
  • Daily Ammonia Clearance: Ensures the safe removal of 10–20 g of ammonia that is produced daily in a healthy adult through normal protein turnover.

FAQs about Urea Cycle Steps

  1. What activates the urea cycle?

N-acetylglutamate (NAG) activates the urea cycle by activating carbamoyl phosphate synthetase I, the rate-limiting enzyme of the pathway. NAG levels rise after a protein-rich meal, helping the liver detoxify increased ammonia more efficiently.

  1. What is Ornithine Transcarbamylase (OTC) deficiency?

OTC deficiency represents the only X-linked recessive disorder among the urea cycle disorders.

As a result of this disorder, carbamoyl phosphate accumulates and is diverted into pyrimidine synthesis, forming orotic acid, which appears in blood and urine and is often observed as orange crystals in infant diapers.

  1. What is Argininosuccinate Synthetase Deficiency?

Also known as Citrullinemia Type I, this autosomal recessive disorder presents with elevated citrulline and ammonia. This disorder presents with seizures, lethargy, and respiratory distress in infants, while adults experience much milder symptoms like vomiting, ataxia, and lethargy.

  1. How are urea cycle defects diagnosed?

Diagnosis is often based on a plasma amino acid profile, which, in the case of a defect, may show elevated glutamine, alanine, citrulline, or argininosuccinate. OTC deficiency is suggested by elevated urinary orotic acid. Monitoring for ammonia is necessary if unexplained neurological symptoms occur.

  1. In which areas is the concept of the urea cycle steps applied?

The concept of the urea cycle steps is used in fields such as medicine (diagnosing metabolic disorders and liver function), genetic counselling (inherited urea cycle disorders), and environmental science (understanding nitrogen metabolism).

Conclusion

Mastering the urea cycle helps medical students correlate metabolic pathways with clinical practice, particularly in understanding ammonia detoxification and its disorders. The mechanisms, regulation, and clinical implications constitute the necessary knowledge base for MBBS students.

DocTutorials makes complex biochemical pathways easier to understand and remember through 3D-animated videos and structured mentorship and guidance from experts.

Reinforce your concepts, improve exam scores, and boost your medical journey—opt for DocTutorials’ MBBS curriculum and build the confidence to excel as a future doctor.

NEET PG Online Live Power Pack
DocTutorials App Download Now

Latest Blogs

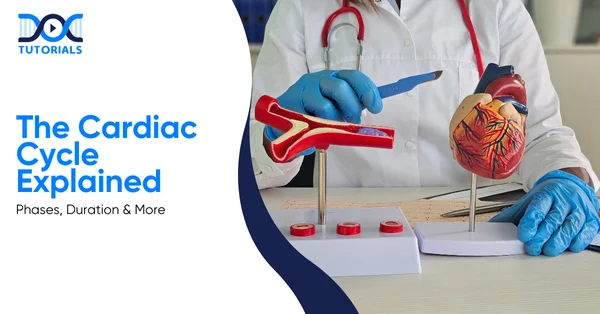
The Cardiac Cycle Explained: Phases, Duration & More 

Cardiac Cycle | DocTutorials

The cardiac cycle defines the sequence of mechanical and electrical events in one complete heartbeat. The filling of the heart with blood, the forward movement of blood, and preparation for the next beat are included in its explanation. Such is the coordination that even a small mistake in the timing of any event affects cardiac output.

The understanding of the cardiac cycle is crucial for MBBS students, and it forms the foundation for topics under cardiovascular pathology. Hence, mastering these will make clinical correlations quite easier.

Read on to understand it step by step!

What is the Cardiac Cycle? 

A cardiac cycle is regarded as the cycle that takes place in the heart from one beat to the next, encompassing phases such as diastole, or the filling of the heart, systole, or the contraction of the heart, and then a brief pause. These phases of the heart cycle are prompted by electric pulses that trigger the contractions of the heart.

A cardiac cycle is basically the sequence of events that happen in the heart as it beats. It is the process from the start of one beat to the next. It is basically a series of events related to the pressure that is responsible for the blood flowing through the heart and into the body. These events do not occur haphazardly. This is brought about by the electric and mechanical currents of the myocardium, which result in the heart beating.

Moreover, heart valves also play a vital role. These heart valves open and shut with the help of pressure differences created in the heart, causing blood to move forward and not backwards. Thus, the heart cycle is also responsible for a programmed way of blood circulation from one heart chamber to the other and then to the body.

The cardiac cycle is made up of three phases:

  • Diastole: This refers to the relaxation phase, where the heart is filled with blood.
  • Systole: This is the contraction phase, where blood is ejected.
  • Intervening Pause: A pause that falls between beats. 

All these stages make up one beat of the heart. If an average heart beats 72 times in a minute, then there are approximately 72 heart cycles in a minute. Hence, one heart cycle takes about 0.8 seconds.

How Does Electrical Activity Trigger the Heart Cycle?

A cardiac cycle starts at the cellular level. Contractions are caused by electricity, which means that the heart is not capable of functioning without proper electrical conduction.

Here’s how it happens:

  • An electrical impulse starts at the sinoatrial (SA) node
  • Both atria contract together
  • The impulse briefly pauses at the atrioventricular (AV) node.
  • Both ventricles now contract together.

This pause is significant as it allows the ventricles to fill before they contract. Moreover, the electrical event of depolarisation is not simultaneous with muscle contraction. This is because there is a lag between depolarisation and muscle contraction, which occurs before the muscle contraction takes place.

All these electrical and mechanical activities result in changes in the pressure-volume state of the heart chambers. The entrance of calcium ions (Ca++), along with other factors, helps sustain the contraction of cardiac muscle. 

Due to the regular pattern of these pressure changes, they can be depicted using a graphical representation called the Wiggers diagram.

A simplified table is given below: 

AspectWhat It Represents
Electrical activitySeen on ECG (e.g., QRS complex)
Mechanical responseContraction of atria or ventricles
Pressure changesRise and fall within chambers
Clinical relevanceHelps interpret heart sounds and murmurs

For instance, in the Wiggers diagram, the QRS complex is shown before the onset of ventricular systole. This is important, as any confusion between the timing of the QRS complex and that of ventricular systole could potentially produce a mistake in clinical practice.

What are the Phases of the Cardiac Cycle? 

The heart cycle consists of stages that ensure the smooth flow of blood. It begins with atrial diastole, a phase that allows the heart to relax as the ventricles fill with blood. Next is the atrial systole, which forces the remaining blood into the ventricles. This is followed by the ventricular systole, which increases the pressure to ensure that the blood is pumped into the arteries. Finally, there is the ventricular diastole, which allows the ventricles to relax as they fill with blood. 

A heart cycle is divided into distinct phases that occur in a definite order. These stages help understand the filling phase of the heart with blood, its subsequent ejection phase, the phase where it pushes the blood forward, and then prepares for the next cycle. 

This is a consecutive process, but it would help to understand it phase by phase since a phase is closely related to either the change in pressures or the functioning of valves.

From a broad perspective, the heart cycle comprises diastole and systole. Within these phases, distinct phases of the cycle occur. These are explained below: 

  1. Atrial Diastole (Relaxation of the Atria)

When the cardiac cycle begins, both the atria and the ventricles are relaxed. This is a passive phase, and it is critical. Here’s what happens:

  • Blood enters the right atrium through the superior vena cava, inferior vena cava, and coronary sinus.
  • Blood enters the left atrium through the four pulmonary veins.
  • The atrioventricular (AV) valves, the tricuspid and mitral, are open. 
  • Semilunar valves, namely the aortic and pulmonary valves, remain closed.

As the AV valves are open, there is a free flow of blood from the atria into the ventricles. Hence, the major contribution to the filling of the ventricles (approximately 70-80%) takes place without any active contraction. 

This phase clearly indicates that the heart does not purely depend on force, as the work is being done by the various pressure forces.

  1. Atrial Systole (Atrial Contraction)

Atrial systole refers to the electrical depolarisation of the atria, represented by the P wave on the ECG. In this, the atria are said to be actively contracting.

Atrial contraction pushes the remaining blood into the ventricles, a contribution known as the atrial kick, which completes ventricular filling. However, closure of the atrioventricular valves does not occur due to atrial systole but rather when rising ventricular pressure exceeds atrial pressure at the beginning of ventricular systole.

Although brief, atrial systole is important because it ensures that the ventricles are optimally filled before they contract. Following this, the atria relax and return to diastole. They will not contract again until the next cycle.

  1. Ventricular Systole (Ventricular Contraction)

This phase starts following ventricular depolarisation, evident by the QRS complex in the ECG. It does not make any sense if it is taken as one event alone; therefore, it is classified into two phases:

  1. Isovolumic Contraction
  • Contractions of the ventricles start.
  • Pressure in the ventricles increases.
  • The mitral and tricuspid valves shut to ensure no backflow into the atria.
  • The semilunar valves remain closed.

As no valves are open, there is no blood leaving the ventricles. So, volume remains the same while the pressure increases. That is why this phase is called isovolumic contraction.

  1. Ventricular Ejection

As the ventricular pressure increases further:

  • Pressure is higher than that of the aorta or pulmonary trunk.
  • Aortic and pulmonary valves open.
  • Blood is released into the systemic circulation as well as the pulmonary circulation. 

Both ventricles produce the same amount of blood, called stroke volume. But the left ventricle produces a far higher pressure since it supplies the entire body.

4. Ventricular Diastole (Ventricular Relaxation)

Following contraction, the ventricles start to relax. This phase is similarly subdivided into two parts because valve movements differ, along with pressure changes:

  1. Isovolumic Relaxation
  • Ventricles relax, and pressure falls.
  • Blood in the aorta and pulmonary artery tries to flow back.
  • The semilunar valves close, leading to the dicrotic notch.
  • AV valves are still closed.

Since all the valves are closed, the ventricular volume does not change. The pressure drops rapidly; hence, this phase prepares the ventricles for filling.

  1. Ventricular Filling

Once ventricular pressure falls below atrial pressure:

  • The opening of the mitral and tricuspid valves occurs.
  • Blood flows from the atria into the ventricles.
  • Both chambers are in diastole.

This completes the cardiac cycle. There is continuous blood flow from the veins to the atria so that the next cycle does not have to restart, but can rather continue without an irregularity. The heart shouldn’t skip or disturb the sequence of the cardiac cycle, because even with a minor mistake in timing, cardiac output may be affected.

The summary for the stages of the cardiac cycle is given below: 

PhaseKey Event
Atrial diastolePassive filling of atria and ventricles
Atrial systoleActive atrial contraction
Isovolumic contractionVentricular pressure rises, no ejection
Ventricular ejectionBlood pumped into the arteries
Isovolumic relaxationVentricles relax, valves closed
Ventricular fillingBlood flows into the ventricles

What is the Duration of the Cardiac Cycle? 

The duration of the cardiac cycle is 0.8 seconds when one is resting. Atrial systole is very brief, then ventricular systole, with diastole being the longest. All phases overlap, meaning that the heart beats throughout. Even slight variations in timing would influence heart functioning.

The duration of the cardiac cycle is defined as the time for one complete heartbeat from the beginning of one cycle to the start of the next. In an average healthy adult human at rest, the heart beats about 72 times per minute. This rate is reasonably consistent, so the time for one cardiac cycle can be estimated easily.

At 72 beats per minute:

  • 1 ÷ 72 = 0.0139 minutes per beat
  • This is about 0.8 seconds per cardiac cycle.

In other words, each heartbeat takes less than a second. That may sound brief, but in that brief span of time, a lot happens, and that is where the need for such precision in timing comes into play.

Duration of Individual Phases of the Cardiac Cycle

Although the total time for one complete cardiac cycle is approximately 0.8 seconds, the timeframe covered by each event of the cycle is unequal because the heart must fill before ejecting, and filling doesn’t happen instantaneously.

Atrial systole is brief due to the fact that it is only intended to provide the final push into the ventricles. Ventricular systole, though, will take more time since blood needs to be strongly pumped into both the pulmonary artery and the aorta. 

Meanwhile, ventricular diastole takes up the largest portion of the cycle because proper filling is of importance, and an incomplete relaxation will not allow the heart to function well.

PhaseApproximate Duration
Atrial systole0.1 seconds
Ventricular systole0.3 seconds
Atrial diastole0.7 seconds
Ventricular diastole0.5 seconds

The overlap between atrial and ventricular phases keeps the blood continuously circulating. For instance, during ventricular systole, atrial diastole extends well into it in order for the atria to refill while the ventricles are contracting. Thus, this makes the heart work in a very efficient manner without pauses.

Thus, understanding the sequence and duration of events in the cardiac cycle provides insight into the normal rhythmic heart beating, variations in heart rate, and why the heart cannot hasten or prolong any period of the cardiac cycle. Small changes in the timing can lead to altered cardiac output during conditions such as exercise or disease states.

What is the Haemodynamics of the Cardiac Cycle? 

Haemodynamics is concerned with the study of blood circulation through the heart and arteries or veins during the heart cycle. Blood circulation is aided by the presence of differences in pressure; therefore, it is filled and ejected effectively. Stages involved in haemodynamics include relaxation, filling, contraction, and ejection phases.

Haemodynamics is basically the study of the flow of blood through the heart and blood vessels of a body or individual organism during the cardiac cycle. It can be simply described as the understanding of the process that allows the heart to fill with blood and then release it effectively. 

This mechanism can be analysed using a graph called the pressure-volume curve of the heart, which actually represents the left side of the heart since it works at high pressures, whereas the same process takes place on the right side of the heart at low pressures.

Pressure-Volume Variations During the Cardiac Cycle

There are four phases of ventricular functioning. All of these phases are governed by the principles of haemodynamics. This implies that there is a certain amount of difference in the pressure between phases, resulting in blood flowing from the higher to the lower-pressure areas.

PhaseValve StatusWhat HappensWhy It Matters
Isovolumic RelaxationAortic valve closed (S2 heard); Mitral valve closedVentricular pressure falls rapidly, but volume doesn’t changeThe pressure drop creates a gradient, so the mitral valve can open. Without this, blood won’t enter the ventricle
Ventricular FillingMitral valve open; Aortic valve closedBlood flows from the atrium into the ventricle, increasing ventricular volumeFilling occurs due to the elastic recoil of blood vessels; hence, the heart doesn’t actively pull blood in
Isovolumic ContractionMitral valve closed (S1 heard); Aortic valve closedVentricular pressure rises rapidly, but blood can’t leave the ventriclePressure builds up to a level high enough for ejection
Rapid Ventricular EjectionAortic valve open; Mitral valve closedBlood is ejected into the aorta; over 60% of ventricular blood is expelledThis phase ensures effective blood delivery to the body

Pressure Differences between Heart Chambers

Blood circulation in the heart cycle is driven by the differences in pressure between the heart chambers and blood vessels. It is characterised by the following values of blood pressure:

Heart Chamber / VesselPressure (mmHg)
Left ventricle120 / 15
Right ventricle25 / 5
Right atriumMean 4–5
Pulmonary arteries / Left atrium25 / 10
Aorta120 / 80

Haemodynamics helps clarify “why heart sounds occur, what heart valves do, or why blood keeps flowing.” Furthermore, because each step must work precisely to achieve the right pressure change, the tiniest disturbances can affect cardiac output. 

Hence, the study of haemodynamics is critical in understanding heart sound phenomena and pressure-volume loops, among other heart conditions.

Heart Sounds and Cardiac Auscultation

Cardiac auscultation involves listening for the heart sounds, with emphasis on the sound of the valves closing. S1 or “lub” is responsible for systole, while S2 or “dub” is responsible for diastole. Both murmurs, S3 or S4, can reveal improper heart functioning.

Cardiac auscultation is the process of listening to heart sounds that are produced at each stage of the cardiac cycle. Since blood actually courses rather smoothly through both chambers and valves of the healthy heart, it cannot be heard. What the clinician hears is the sound of the heart valves snapping shut. 

Heart sounds are thus produced by the movement of blood through the valves and the resultant snapping shut of the valves, rather than by blood flow itself. These sounds reflect the precise timing and coordination of the cardiac cycle.

Normal Heart Sounds

During routine auscultation, two major heart sounds are normally discerned. These are normally described as “lub” and “dub”, names that together apply to one heartbeat.

Heart SoundWhen It OccursValve ClosureWhat It Marks
S1 (Lub)End of ventricular fillingAtrioventricular valves (mitral and tricuspid)Beginning of ventricular systole
S2 (Dub)End of ventricular ejectionSemilunar valves (aortic and pulmonary)Beginning of ventricular diastole

Thus, these sounds help clinicians locate where the heart is within the cardiac cycle.

Heart Murmurs

Abnormal blood flow may occur when the heart valves are damaged. The valves may thicken and narrow (stenosis) or leak (regurgitation). As a result of that, the flow of the blood becomes turbulent instead of being smooth.

  • Turbulent flow creates a humming or whooshing sound.
  • These sounds are termed heart murmurs.
  • Murmurs can occur during systole, diastole or both. 

Therefore, murmurs are important clues to underlying valve disease, even in the absence of symptoms.

Additional Heart Sounds (S3 and S4)

In certain clinical instances, additional heart sounds may be present apart from S1 and S2. These are less common but highly informative:

Heart SoundTiming in the Cardiac CycleMechanismNormal OccurrenceClinical Significance
S3Early diastole, just after S2Rapid deceleration of blood flowing from the left atrium into the left ventricleNormal in children, young adults, and athletesIn older adults, it often indicates congestive heart failure
S4Late diastole, just before S1Atrial contraction against a stiff ventricleNot considered normalAssociated with reduced ventricular compliance and left ventricular hypertrophy

These sounds shouldn’t be ignored, as they often point toward structural or functional cardiac problems.

FAQs about the Cardiac Cycle

  1. What are the various stages of the heart cycle?

A cycle of the heart comprises several distinct stages that occur in a definite order. These stages include atrial diastole, atrial systole, isovolumic contraction, ventricular ejection, isovolumic relaxation, and ventricular filling. All these stages work together to ensure that the heart is filled with blood before it can be pumped. Due to their consecutive dependency, the stages cannot be interrupted for the continuity of circulation.

  1. What takes place in the systole phase?

Systole is the phase where the heart chambers contract. During the ventricular systole phase, the blood is pumped into the aorta and pulmonary trunk. This is the phase that creates the pressure for the blood to move onwards; therefore, systole is crucial for the blood to reach the body and lungs.

  1. What is the diastole phase? 

Diastole is the relaxation phase of the heart cycle. During this phase, the heart chambers are filled with blood after being pumped out during the systole phase. This phase is important since the amount of blood pumped depends on the efficiency of blood filling into the heart. Therefore, diastole would not be effective if the heart fails to relax correctly.

  1. What are the key symptoms of diastolic dysfunction?

When diastolic dysfunction happens, the heart’s ventricles become stiff and lose their ability to relax. It leads to reduced filling of the heart. Symptoms of diastolic dysfunction include:

  • Breathing difficulties
  • Weakness
  • Dizziness
  • Nausea 
  • Loss of appetite 
  • Coughing or wheezing

These signs occur because the heart cannot fill with blood or pump it effectively. 

  1. Why is knowing the cardiac cycle important? 

A description of the cardiac cycle is important for understanding heart sounds, blood pressure fluctuations, and heart valve functioning. Furthermore, it is significant for understanding heart failure or heart valve dysfunctions. 

Conclusion 

Understanding the cardiac cycle is fundamental for every medical student. It explains how the heart fills and pumps blood in a precise duration and sequence, and relaxes, allowing blood to flow with ease throughout the body. Because small timing errors can impact cardiac output, a clear grasp of this cycle helps you link physiology with clinical findings and exam concepts.

At DocTutorials, we are committed to making you master all the core medical topics with crystal-clear explanations, expert lectures, and high-yield resources tailored for MBBS and exam preparation.

Check out our MBBS courses and learn smarter to excel in your medical career with confidence!

NEET PG Online Live Power Pack
DocTutorials App Download Now

Latest Blogs

Ectropion: Causes, Symptoms, Risk Factors, Diagnosis, Treatment, and Complications

Ectropion | DocTutorials

Ectropion could appear as a minor deformity of the eyelids. It is characterised by an outward turning of the eyelids, which can quickly lead to irritation, tearing, and serious complications if the condition goes untreated. Thus, understanding its causes, symptoms, and treatment options is key to preventing long-term damage. 

Here’s everything you need to know about ectropion – its risks, diagnosis, treatment, and how it is best managed. Keep reading!

What is Ectropion? 

Ectropion is the outward turning of the eyelid, in which the eye is exposed and irritated. The condition may arise from ageing, facial nerve disorders, scarring that pulls on the lid, or something physically weighing on the lid. It helps to know whether it is involutional, paralytic, cicatricial, or mechanical when planning treatment.

Ectropion refers to an eyelid malposition in which the eyelid, usually the lower one, turns outward, away from the eyeball. As a result of its rolled-out nature, the inner surface of the eyelid becomes visible and gives an easily recognisable reddish appearance on examination.

This turning out means that the eyelid does not lie against the eye in a normal manner. Therefore, poor tear drainage and improper protection and lubrication of the eye’s surface occur. This leads to tearing, dryness, irritation, and sometimes inflammation in patients.

Ectropion can affect one or both eyes. It can also involve the upper lid, though that’s less common. This condition is the opposite of entropion, wherein the eyelid rolls inward.

Because the key symptom is exposed conjunctiva, ectropion is easily detected, aiding in the prevention of complications. Artificial tears are the most common starting point for treatment, although chronic cases may necessitate surgery.

What are the Types of Ectropion? 

Ectropion can be either congenital, which is rare and present at birth, or acquired. Most of the cases you will encounter are acquired, and they fall into four main types:

  1. Involutional: This is the most common type, and it occurs due to loosening of the eyelid muscles and ligaments with age, thus turning the lid outward.
  2. Paralytic: This type develops when the facial nerve isn’t working properly. With the loss of tone of the eyelid, it cannot maintain its normal position and rolls outward.
  3. Cicatricial: This involves scar tissue. Injury, surgery, burns, or even chronic sun exposure can cause skin contraction, which pulls the eyelid outward.
  4. Mechanical: This is a case when something physically weighs over the eyelid, such as a tumour or mass, and this lid gets displaced, turning outward.

What are the Causes of Ectropion? 

Ectropion is generally caused by age-related loosening of the muscles and ligaments of the eyelid, but may also be caused by facial nerve palsy, scarring of the skin from injuries or surgery, mechanical forces from masses or swelling, and some congenital conditions such as Down syndrome. Additional contributing causes may include stroke, skin cancer, radiation, or rapid weight loss, which can impair the function of eyelid support or nerves.

The causes of ectropion will depend on the type, but most of them boil down to changes in the supporting structures of the eyelid. As tissues naturally loosen with age, muscle weakness and ligament laxity remain the most common reasons people develop ectropion. However, there are several other triggers, too. 

The causes of ectropion, based on its type, are given below: 

  1. Involutional Ectropion

In this type of ectropion, the cause is primarily age-related. Over time, the muscles and ligaments lose tone within the eyelids, so the lid is not able to pull tightly against the eye. Chronic eye rubbing can also exacerbate it.

  1. Paralytic Ectropion

This is because of the malfunctioning of the facial nerve, as in Bell’s palsy and other palsies of the facial nerves. The eyelid tone is controlled by the nerve, and due to its paralysis, the lid droops and rolls outward.

  1. Cicatricial Ectropion

Scarring pulls the eyelid outward. This can occur after blepharoplasty, trauma, burn injuries, chemical injuries, and even chronic sun exposure. Any contracted scar tissue may pull the lid away from the eyeball.

  1. Mechanical Ectropion 

Here, something physically weighs the lower eyelid down, such as a tumour, mass of the eyelid, fat prolapse, or considerable oedema. Because it is weighted down, the lid cannot remain in its usual position.

  1. Congenital Ectropion 

This is present at birth. Conditions such as Down syndrome or blepharophimosis syndrome increase the chance of an outward-turning eyelid. 

  1. Other Contributing Factors

Some individuals have ectropion due to the following:

  • Stroke
  • Eyelid skin cancer
  • Radiation
  • Rapid weight loss 
  • Previous eye surgeries 

In general, the aetiology usually points either to tissue laxity, nerve dysfunction, scarring, or mechanical pull. Identification of its cause does matter, since the treatment approach generally relies on what is actually driving the malposition.

What are the Risk Factors of Ectropion? 

Anything that weakens, loosens, or pulls on the eyelid makes ectropion more likely. The biggest risk is age, but it can also be due to past eyelid surgery, injuries, chronic sun exposure, rubbing the eyes, and certain skin conditions. Facial nerve palsy and long-term use of some eye drops may also weaken the support to the eyelids. Anything that affects eyelid tone or skin elasticity thus increases the risk for ectropion.

There are several factors that will increase the likelihood of ectropion development. The key risk factors include:

  • Ageing: With a laxity of the eyelid muscles and ligaments taking place over time.
  • Previous Surgery on the Eyelid: Procedures such as blepharoplasty can alter the support and increase the risk.
  • Eyelid Injuries or Trauma: Cuts, burns, and other types of damage can weaken the lid or distort its shape.
  • Chronic Sun Exposure: This leads to long-term UV damage, affecting skin elasticity.
  • Frequent Eyelid Rubbing or Pulling: This can stretch the tissues, so the lid cannot stay in place.
  • Wearing Contact Lenses: If contact lens insertion/removal habits pull on the lid, it increases the risk of developing ectropion. 
  • Skin Disorders: Skin disorders of the eyelids, including dermatitis or chronic inflammation.
  • Facial Nerve Palsy or Facial Paralysis: This is a condition due to the eyelid losing its tone and drooping.
  • Prolonged Use of Some Eye Drops: Certain formulas of eye drops can irritate or weaken eyelid tissues.

Generally speaking, anything that loosens, injures, or tugs on the structures of the eyelid can put one at risk for ectropion.

What are the Symptoms of Ectropion? 

Ectropion results in irritation, dryness, redness, and, at times, persistent watering of the eyes. The individual may experience foreign body sensation, crusting, or discharge, or even develop recurring conjunctivitis. If there is a sudden pain, hypersensitivity to light, or dimming of vision, urgent medical attention is required.

Because ectropion involves an eyelid which either poorly protects or lubricates the eye, symptoms often do not take very long to appear. The outward turning of the lower lid can cause the tears not to drain correctly and to leave the eye exposed longer than it should. 

This results in dryness mixed with irritation and excessive tearing, symptoms which sound contradictory but happen all the time in ectropion.

Common symptoms include:

  • Foreign body sensation, like there’s sand, grit, or something stuck in the eye.
  • Dryness because the tears are not evenly spread on the surface.
  • Redness is attributed to both irritation and exposure of the conjunctiva.
  • Burning or stinging that may worsen during the course of the day.
  • Excessive tearing, due to puncta being unable to drain the tears when the lid is pulled outward.
  • Light sensitivity from surface dryness and inflammation.
  • Watery or mucous-like discharge, especially upon waking.
  • Crusting of the eyelashes, which results from the accumulation of secretions during the night.
  • Chronic conjunctivitis, recurrent “pink eye” due to constant exposure.

Symptoms that require immediate professional medical intervention include:

  • Suddenly, severe sensitivity to light
  • Rapidly increasing redness
  • Diminished or cloudy vision

These could indicate complications or worsening ocular surface damage and must not be disregarded. 

What is the Procedure of Diagnosis for Ectropion? 

Diagnosis of ectropion is essentially clinical, and the outwardly turned eyelid is usually pretty obvious. The lid position, laxity, and speed of snap back are examined, as well as the cornea for dryness or damage. The physician will also examine for scars, skin changes, or masses and review medical history to identify the exact cause of ectropion. These steps allow a doctor to choose the appropriate treatment and avoid complications.

The diagnosis of ectropion is mostly clinical, and it does not take that long for a medical professional to notice it. Since the lower eyelid normally sits about 1-2 mm above the inferior corneal limbus, any drooping or outward turning becomes fairly apparent rather quickly. But a proper diagnosis still involves a structured exam, because the cause and severity matter for treatment.

Here’s how the evaluation usually goes:

Diagnostic ProceduresWhat It InvolvesWhy It’s Done
Clinical ExaminationThe doctor inspects the eyelid position, lid laxity, lid margin, and whether the eyelid pulls away during blinking.Helps confirm that the lid isn’t sitting properly and rules out entropion or other eyelid malpositions.
Snap-Back TestThe lower eyelid is gently pulled downward and released.If the lid doesn’t “snap back”, it indicates poor tone or laxity.
Distraction TestThe lid is pulled forward horizontally.Measures horizontal laxity and determines whether surgery is needed.
Slit-Lamp ExaminationEvaluates the cornea, conjunctiva, and tear film.Checks for exposure keratopathy, dryness, irritation, or corneal damage.
Facial Nerve AssessmentLook for signs of facial palsy—like incomplete eye closure or weak facial muscles.Identifies paralytic ectropion, since nerve dysfunction can worsen eyelid drooping.
Imaging (if required)CT or MRI only when tumours, trauma, or scarring are suspected.Helps rule out structural causes like fractures or mass lesions.
Tear Function TestsSchirmer test or tear breakup time (TBUT).Assesses how much dry-eye–related damage has occurred due to eyelid eversion.

What are the Treatment Options for Ectropion? 

Ectropion treatment involves eye protection, accomplished with the use of lubricating drops, gels, and ointments, but most cases will eventually require surgery. Depending on the cause, doctors may tighten the eyelid with a lateral tarsal strip procedure or use skin grafts when scarring pulls the lid down. Scar management, stopping harmful eye drops, and treating skin conditions may also help.

The treatment options for ectropion are explained below: 

  1. Lubrication & Ocular Surface Protection

Treatment almost always begins with aggressive lubrication: artificial tears, gels, and ointments. These protect the cornea so it doesn’t dry out or get damaged.

If the ocular surface is stable, there is usually no urgent need to fix the eyelid immediately. However, in cases such as facial palsy, where the cornea is already compromised, the eye can quickly deteriorate. Severe exposure may lead to keratopathy, scarring, and even permanent vision loss; thus, early intervention is critical.

Patients may also use skin tape that temporarily lifts the lid, but it has to be done correctly – always under medical guidance. Improper use can worsen symptoms.

  1. Eradication of Predisposing Factors

Sometimes, ectropion is related to long-term use of certain eye drops. In that case, your provider will have you stop using them.

Similarly, if a skin condition is pulling the lid outward, anti-inflammatory treatment, most of the time steroids, can help stabilise it.

  1. Non-Surgical Scar Management

In cicatricial ectropion due to scarring or previous lower-lid surgery, stretching of the scar tissue may be helpful.

This can include:

  • Steroid injections
  • Scar massage
  • Softening the tissue over time

However, these methods don’t always work, and many patients still require surgical correction.

  1. Surgical Treatment (Definitive Management)

Involutional, paralytic, or cicatricial causes of ectropion are usually corrected with surgery. Surgery is usually performed with the use of local anaesthesia and is very effective.

The types include: 

  1. Lateral Tarsal Strip Procedure, Commonly for Involutional Ectropion

This is the standard surgery when there is an issue with eyelid laxity.

It typically includes:

  • Lateral canthotomy combined with lower cantholysis
  • Complete disinsertion of the canthus
  • Removing a small wedge of the lateral lower eyelid
  • Reattachment of the lid to the periosteum of the lateral orbital rim

With this, by tightening and repositioning the eyelid, the lid sits properly again, protecting the globe. This procedure is also useful in facial palsy where orbicularis function is poor.

  1. Skin Grafting For Cicatricial Ectropion

If the skin of the eyelid is vertically shortened, like following an overly aggressive blepharoplasty, trauma, or chronic inflammatory skin disease, a full-thickness skin graft may be necessary.

Common donor sites include:

  • Upper eyelid (ipsilateral or contralateral)
  • Preauricular skin
  • Postauricular skin

Most surgeons find that a skin graft combined with a lateral tarsal strip provides the best result.

In cases when scars are pulling down the eyelid, the surgeon may have to dissect and release the cicatrix. At times, a temporary tarsorrhaphy, including Frost sutures, may be performed in order to support healing and provide for elevation of the eyelid while recovering.

  1. Multiple Surgeries 

Patients with facial paralysis or extensive scarring often require several procedures to re-establish normal eyelid position. Bilateral involvement is not rare, and even if both lids are asymmetrically involved, surgeons may repair both for a more symmetric result.

5. Cuidado Postoperatorio

After surgery, patients may require:

  • A temporary eye patch
  • Steroid ointment or antibiotic drops
  • Cold compresses
  • Over-the-counter pain relievers

Most patients don’t have recurring symptoms once healing’s complete.

What are the Complications of Ectropion? 

If ectropion is left untreated, the chronically exposed eye may become dry and irritated, susceptible to the development of infections. Over time, this may lead to complications such as conjunctivitis, scratches on the cornea, and even vision-threatening ulcers. Many early complications are minor, but irreversible scarring or permanent loss of vision can result from long-term disease. 

If ectropion is not treated in time, the continued exposure of the eye may start giving rise to serious problems. This is because the eyelid is not in the correct position against the eye; thus, the cornea and conjunctiva remain unprotected. The first result of this situation is irritation, but the complications can be much more grave later on.

Here’s what can happen:

  • Chronic Irritation and Dryness: The eye’s exposed condition makes it a constant source of discomfort and inflammation. 
  • Recurrent Conjunctivitis: The fact that the protective barrier isn’t doing its job makes it easy for bacteria to sneak in, causing redness, discharge and that nasty morning crust.
  • Corneal Abrasions: The dry, exposed surface can be scratched easily.
  • Corneal Ulcers: Left untended, the dryness or infection can develop into deep ulcers, which can badly affect your vision. 
  • Impaired Vision: Long-term irritation or damage to the cornea can reduce clarity.
  • Permanent Blindness: Corneal ulcers or infection can, unfortunately, advance to the point of causing permanent blindness, though this is pretty rare.

FAQs about Ectropion

  1. Can ectropion go away on its own?

No, it rarely heals on its own. Lubricants can help ease the symptoms, but the position of the eyelid will not self-correct. Most moderate-to-severe cases eventually require surgery.

  1. Is ectropion serious or dangerous?

Not during the earlier stage of the disorder, but it may be serious if not treated on time. Chronic exposure of the eye’s surface can cause irritation, keratitis, ulcers, or even loss of vision. So it’s not harmless in the long run.

  1. What are the common causes or risk factors of ectropion?

The most common cause is age-related laxity. Other causes include previous eyelid surgery, facial palsy, scar tissue from trauma/burns, skin disorders, and chronic rubbing.

  1. What symptoms should make you suspect ectropion?

A drooping or outward-turned lower eyelid, tearing, dryness, redness, irritation, discharge or crusting, and sometimes difficulty closing the eye.

  1. What are the treatment options for ectropion?

Early symptoms are helped by lubricants, but chronic or severe cases usually require surgical correction aimed at tightening or repositioning the eyelid.

Conclusion 

Ectropion is more than just a lid that looks “off”. Because the eyelid rolls outward and no longer protects or properly lubricates the eye, there’s a real risk of dryness, constant irritation, tears, and even serious complications like corneal damage, ulcers, or chronic infection if it’s left untreated.  

Procedures such as a lateral tarsal strip or skin graft, in the case of scar-related instances, can restore normal eyelid position, protect the cornea, and prevent vision loss. Ectropion is an important topic when preparing for the NEET-PG or similar exams; hence, its types and available treatment options need to be understood.

Looking for sources for your NEET PG prep? DocTutorials simplifies medical exam preparation through systematic teaching and strong learning tools. From expert video lectures to high-yield Q-banks, everything is just where you need it.

Check out our NEET PG courses today!

NEET PG Online Live Power Pack
DocTutorials App Download Now

Latest Blogs

Mixed Connective Tissue Disease: Causes, Symptoms, Diagnosis, and Treatment Options

Mixed Connective Tissue Disease | DocTutorials

Mixed connective tissue disease (MCTD) is an uncommon inflammatory autoimmune disorder that involves symptoms of several other complex diseases. There’s no specific treatment for this condition as the symptoms don’t appear at once. They tend to happen over the years, which makes diagnosis harder. 

Thus, the treatment for each person varies depending on their symptoms and the severity of their condition. Keep reading for a detailed analysis of MCTD.

What is Mixed Connective Tissue Disease?

MCTD is a rare autoimmune condition in which the immune system attacks healthy tissues, causing overlapping symptoms of lupus, scleroderma, and polymyositis. It most commonly affects women between 20 and 50 years of age.

Mixed connective tissue disease is a rare autoimmune disorder where the body’s immune system misunderstands its own body tissues as invaders and attacks them. It is characterised by the presence of specific antibodies in the blood, especially anti-U1 ribonucleoprotein (RNP) antibodies.

MCTD features the symptoms of three other connective tissue diseases:

  • Systemic lupus erythematosus (SLE)
  • Scleroderma
  • Polymyositis

Some people also suffer from dermatomyositis, rheumatoid arthritis, or Sjogren’s syndrome. Around 25% of people suffering from MCTD also develop another connective tissue disorder over the course of a few years.

Therefore, it is commonly referred to as ‘overlap syndrome’. It mainly affects females between the ages of 20 and 50, but people of all age groups, including children, can also develop MCTD.

What are the Causes of Mixed Connective Tissue Disease?

The actual cause of MCTD is not known yet, but it is linked to genetic and environmental factors. Viral infections, chemical exposure, and a family history of autoimmune diseases may increase the risk.

While the exact cause of MCTD remains unknown, some research shows that environmental and genetic factors trigger the disease.

Here are a few identified causes of MCTD:

  • Environmental Causes 

Some studies have shown that environmental factors, such as exposure to certain viruses or chemicals, can trigger MCTD in genetically predisposed individuals.

For instance, viral infections like the Epstein-Barr virus (EBV), frequent exposure to chemicals or materials, like polyvinyl chloride and silica, are linked to the onset of autoimmune diseases.

  • Genetic Causes

Research has found that genetic propensity plays a significant role in the development of MCTD. Past data show that individuals with a family history of autoimmune diseases are at an elevated risk of developing MCTD.

Certain genes linked to immune system regulation may increase the likelihood of developing MCTD.

What are the Risk Factors of Mixed Connective Tissue Disease?

MCTD’s risk is higher in women aged from 15 to 50 and in individuals with a history of autoimmune diseases. Other factors, such as geographical location, unhealthy lifestyle habits, poor diet, stress, smoking, and low physical activity, may increase the severity of the condition.

Apart from these causes, studies and past statistics have suggested a few other factors that elevate the risk of developing MCTD:

  • Age and Gender: The symptoms of MCTD are most likely to be found in individuals between the ages of 15 and 50. Women are more susceptible to the disease than men, with a ratio of around 8:1.
  • Geographical Area: Few studies have shown that people living in certain geographical locations are more prone to the disease, but more evidence is required on this.
  • Underlying Conditions: Individuals with other autoimmune conditions, like rheumatoid arthritis, lupus, etc, are at a higher risk of developing MCTD.
  • Lifestyle Factors: Dietary choices and lifestyle habits can also contribute to the risk of developing MCTD. Highly processed foods and low antioxidants in the diet are key factors that contribute to inflammation. Excessive stress, lack of physical exercise, and smoking are some habits that can aggravate autoimmune conditions.

While these factors can’t be directly associated with MCTD, they can increase the severity and progression of the disorder.

What are the Symptoms of Mixed Connective Tissue Disease? 

MCTD causes overlapping symptoms that vary in severity from person to person. Common signs include chronic fatigue, joint pain and swelling, muscle weakness, skin rashes, and breathing or swallowing difficulties.

MCTD shows overlapping symptoms that vary from person to person and also depend on the severity of their condition. The common symptoms of the disorder include:

  • Fatigue and Tiredness 

The most common symptoms of MCTD are chronic fatigue and feeling sick, including mild fever at times. The person will feel unwell most of the time.

  • Swelling and Pain

People experience swelling in their hands and fingers along with sudden joint pain. The shape of the joints may change, and they become irritated and inflamed. The blood flow to your fingers, toes, ears, and nose is affected, causing sensitivity, numbness, and loss of colour in these areas.

This is also called Raynaud’s disease, in which fingers and toes become cold and numb and can even turn white or grey in response to stress. After warming, they may turn red. These symptoms are harder to notice depending on the skin colour.

  • Muscle Weakness

Patients experience muscle weakness, particularly in the upper arms and thighs. Muscles become tender, leading to severe pain and discomfort.

  • Skin Problems

MCTD is also characterised by several skin issues, like rashes and irritation. It features mostly red or brown patches over the knuckles, specifically a butterfly-shaped rash across the cheeks and nose. These signs are also harder to notice at the onset of the disorder.

  • Difficulty in Breathing

People often complain about a persistent cough and shortness of breath. Involvement of the oesophagus may also cause difficulty swallowing (dysphagia).

How is Mixed Connective Tissue Disease Diagnosed?

MCTD is diagnosed through a step-by-step evaluation of symptoms, medical history, and physical findings. Doctors confirm the condition using blood tests for anti-U1 RNP, along with urine tests, imaging studies, and sometimes a biopsy.

MCTD can be diagnosed in several steps because it presents overlapping symptoms. The healthcare professionals begin with a clinical evaluation assessing symptoms, family health history, and underlying conditions (if any) of the patients, and then proceed to other lab tests if they suspect MCTD.

Several diagnostic tests are carried out to confirm the diagnosis of MCTD:

  • Blood Tests: The presence of several antibodies can be confirmed through blood tests. The presence of anti-U1 RNP antibodies is a key indicator of MCTD. However, doctors also check for other antibodies, such as antinuclear antibodies (ANAs) and antiribonucleoprotein antibodies (anti-RNP antibodies).

The presence of these autoantibodies is mandatory for the diagnosis of MCTD, but not all people with these antibodies have the disorder. In addition, the doctor may also prescribe CBC (Complete Blood Count) and ESR (Erythrocyte Sedimentation Rate) to assess the degree of inflammation in the patient.

  • Urine Tests: These tests are carried out to check the overall health and functioning of the kidneys.
  • Imaging Tests: In cases of severe joint problems, the doctor may prescribe X-rays, CT (computed tomography) scans, or MRIs (magnetic resonance imaging) to assess joint involvement or involvement of other organs in MCTD.
  • Biopsy: Since MCTD shows overlapping symptoms in some cases, doctors require a biopsy of the affected connective tissue to rule out other conditions.

What are the Possible Complications of Mixed Connective Tissue Disease?

MCTD can lead to serious complications if not managed properly. These include lung and heart problems, infections, kidney and digestive issues, dental problems, and pulmonary hypertension.

MCTD can have several short-term and long-term complications on your health. These can be serious and fatal at times. Here are several complications that MCTD brings, depending on the severity of your condition:

  • Pulmonary Hypertension: It refers to increased blood pressure in the lungs, which can lead to heart failure and death. It is one of the major causes of death among people suffering from MCTD.
  • Interstitial Lung Disease: MCTD is a large group of disorders that lead to scarring in the lungs, causing difficulty breathing. People may require regular oxygen for treatment.
  • Infections: People with MCTD often experience multiple infections due to immunosuppressive treatment, which weakens their immune system.
  • Cardiac Issues: It can cause swelling, irritation, and inflammation around the heart. Parts of the heart become larger and may not function well, which will increase the risk of heart failure and stroke.
  • Kidney Damage: Rarely, people with MCTD experience kidney problems that are mild and can be controlled. However, if the disorder continues for a long time, it can cause kidney damage.
  • Digestive Tract Damage: MCTD often affects the long tube of organs that are responsible for digestion. This can cause heartburn, stomachache, and difficulty in swallowing foods and liquids.
  • Gangrene: People with serious symptoms of Raynaud’s disorder may experience death of tissues in their fingertips, which causes swelling and hardening of the fingers.
  • Hearing Loss: A small study has revealed that almost half of the people with MCTD suffer hearing loss. However, more evidence is yet to be found on this link.
  • Dental Issues: Many people with MCTD develop Sjogren syndrome, a disorder that can be a part of MCTD. It causes dental issues, dry mouth, and loss of teeth.

What are the Treatment Options for Mixed Connective Tissue Diseases?

Treatment for MCTD focuses on controlling symptoms and preventing organ damage. Depending on severity, doctors may prescribe corticosteroids, antimalarial drugs, immunosuppressants, and medicines for lung or blood pressure complications.

There is no permanent cure for MCTD. Medications help lower the symptoms and improve the quality of life. The type of medication depends on the organs affected and the severity of the condition, which can include:

  • Corticosteroids

Low-dose corticosteroid medications like Prednisone are prescribed to manage mild symptoms of MCTD. It helps reduce inflammation and prevents the immune system from attacking healthy tissues.

However, prolonged use of these medicines can increase the risk of high blood pressure, infections, and weakened bones.

  • Antimalarial Drugs

Medicines such as hydroxychloroquine (Plaquenil, Sovuna) are used to reduce symptoms of mild mixed connective tissue disorder. It mostly helps to prevent flare-ups.

  • Calcium Channel Blockers

These medications (nifedipine and amlodipine) are given to people with Raynaud’s syndrome to help relax the muscles in the walls of blood vessels.

  • Immunosuppressants

If major organs are affected by MCTD, the doctor might prescribe immunosuppressant drugs such as azathioprine or methotrexate to reduce your immune system’s activity and prevent organ damage.

  • Nonsteroidal Anti-Inflammatory Drugs (NSAIDs)

These medications are mainly given to ease joint pain and inflammation.

  • Antihypertensive Medicines

MCTD can lead to high blood pressure in the lungs(pulmonary hypertension). In that case, your doctor may prescribe antihypertensive drugs such as bosentan and or sildenafil to manage this condition.

  • Medicines for Lung Disorders

In some cases, MCTD leads to lung scarring (interstitial lung disease). Treatment or medications can’t reverse it, but the doctor prescribes corticosteroids and other medicines to reduce the progression of the condition.

FAQs about Mixed Connective Tissue Disease 

  1. Is MCTD curable?

Presently, there is no cure for MCTD, but its symptoms can be managed with effective treatment and healthy habits. Many people manage to live a fulfilling life by controlling the symptoms through medicines.

  1. Can MCTD affect my quality of life?

Mild symptoms of MCTD are easy to manage, but chronic symptoms can lead to potential long-term complications and hamper your quality of life.

With early diagnosis and an effective treatment plan, individuals can manage the symptoms and maintain a good quality of life.

  1. What is the life expectancy of a person with MCTD?

The life expectancy of people with MCTD depends on the severity of their conditions and the organs affected.

Most of the deaths are caused by pulmonary hypertension, kidney failure, or heart failure. However, with effective treatment, the 10-year survival rate for MCTD is around 80%.

  1. Can lifestyle changes help manage MCTD?

Yes, lifestyle changes can help manage the symptoms of MCTD. Regular physical exercise, a healthy diet, and stress management techniques can help to improve your overall quality of life.

  1. What are the early signs of MCTD?

Early signs of MCTD can include joint pain, swelling of fingers and toes, skin problems, muscle weakness, and fatigue. It is important to consult a doctor immediately, as early diagnosis is the only way to avoid severe MCTD symptoms.

Conclusion

Mixed connective tissue disease is a complex autoimmune condition that features the symptoms of multiple autoimmune disorders. Since there is no cure for this condition, early diagnosis and proper management can save the vital organs from being affected.

To understand more such complex NEET PG concepts, DocTutorials can be your study partner. We offer crisp videos, clinical Qbank, exam-focused notes, flashcards, and mindmaps to help aspirants gain clarity on every medical concept.

Join DocTutorials today and explore our NEET PG course to excel in your medical career!

NEET PG Online Live Power Pack
DocTutorials App Download Now

Latest Blogs

Resting Membrane Potential: Definition, Mechanisms, and Importance

Resting Membrane Potential

The resting membrane potential is a basic electrical property of cells, especially nerve and muscle cells. It refers to the steady difference in electrical charge across the cell membrane when the cell is at rest and not sending signals.

Although it seems inactive, it is a crucial factor because it allows nerves to send messages quickly and muscles to contract. This stable electrical state helps the brain, muscles, and other body systems work normally.

Continue reading to learn more about resting membrane potential.

What is Resting Membrane Potential?

Resting membrane potential is the electrical difference between the inside and outside of a cell when it is at rest. It is caused by the uneven movement of ions like sodium and potassium across the cell membrane.

The resting membrane potential refers to the difference in electrical charge between a cell’s inside and outside when it is not activated. It results from the uneven distribution of ions across the cell membrane, including calcium, sodium, potassium, and chloride. 

It depicts the voltage differential between the cell’s interior and exterior. Other names for it include transmembrane potential, membrane potential, and transmembrane potential gradient. This membrane voltage can be altered by excitable cells in response to internal or external stimuli, including neurons, muscle cells, and some secretory cells.

The operational dynamics of different ion channels, transporters, and exchangers control the membrane’s permeabilities, which in turn dictate the resting potentials of calcium, sodium, potassium, and chloride ions.

What is the Mechanism of Resting Membrane Potential?

The resting membrane potential is maintained by the movement of sodium and potassium ions across the cell membrane. This occurs through diffusion and the sodium–potassium pump, which maintains the cell’s interior negativity.

The resting membrane potential (RMP) is the electrical charge difference across a cell membrane, typically between -70 mV and -90 mV in neurons and muscle cells, when the cell is not actively sending signals.

The sodium-potassium pump, diffusion, and selective permeability of the neuron’s membrane are the three processes that produce a neuron’s resting potential.

While diffusion moves ions passively, the sodium-potassium pump actively carries potassium into the cell and sodium out.

What is the Importance of Resting Membrane Potential?

The importance of resting membrane potential lies in its role in enabling cells to function normally. It allows nerve and muscle cells to generate action potentials, transmit nerve impulses, support cell communication, and maintain ion balance and overall cellular stability.

The resting membrane potential is essential for the proper functioning of many cells. It helps in the following factors:

  • Generation of Action Potentials

When the resting membrane potential hits a threshold value, action potentials, brief electrical impulses, are produced. The transmission of messages along neurons that results in sensory perception, muscular contraction, and other cellular processes depends on these action potentials.

  • Transmission of Nerve Impulse

Intercellular communication and coordination are made possible by the resting membrane potential, which enables cells to produce and send electrical signals. It is essential in excitable cells, such as neurons and muscle cells.

Therefore, action potentials at the neuromuscular junction in skeletal muscle trigger the release of calcium ions from the sarcoplasmic reticulum as they travel through the muscle fibers.

  • Enables Cell Signaling and Communication

RMP facilitates intercellular communication, allowing cells to produce and send electrical signals. For example, resting membrane potential is necessary for neurons to receive, integrate, and transmit information.

  • Maintains Cellular Homeostasis

Resting membrane potential controls the distribution of electrical charges both inside and outside the cell, as well as the ion balance. Proper cellular processes, such as regulating pH, osmotic pressure, and ion transport across the membrane, depend on this equilibrium.


For instance, the resting membrane potential is necessary for neurons to transfer nerve signals. It shifts when a neuron is activated, enabling it to communicate with other neurons.

FAQs about Resting Membrane Potential

1. What is the resting membrane potential?
The resting membrane potential is the electrical voltage difference across a cell’s membrane when it’s inactive, which makes the inside of the cell negative relative to the outside.


2. What is responsible for the membrane potential at rest?
It is mostly brought on by the selective permeability of ion channels and the uneven distribution of ions, particularly potassium and sodium, across the membrane.


3. How is the membrane potential at rest measured?
To compare the internal voltage with the external environment, microelectrodes are placed into the cell.


4. Why is the resting membrane potential essential for the human body? 

It is necessary for the human body as it gives electrical excitability, and without it, neurons and muscle cells cannot produce action potentials or operate as intended.


Conclusion

The resting membrane potential is an essential electrical property that enables neurons and muscle cells to function efficiently. Maintained by ion gradients, selective membrane permeability, and the sodium-potassium pump, it keeps the cell ready to respond rapidly to stimuli. 

This stable yet dynamic electrical state is essential for nerve impulse transmission, muscle contraction, and overall cellular homeostasis, making it fundamental to normal physiological function for survival.


To understand more such topics in NEET PG concepts, DocTutorials can be your study partner. We offer crisp videos, clinical Qbank, exam-focused notes, flashcards, and mindmaps to ensure aspirants are well-prepared before their NEET PG exam.

Join DocTutorials today and explore our NEET PG course to excel in your medical career!

NEET PG Online Live Power Pack
DocTutorials App Download Now

Latest Blogs

Charcot-Marie-Tooth Disease: Causes, Symptoms, Diagnosis, and Treatment

Charcot-Marie-Tooth Disease | DocTutorials

Charcot-Marie-Tooth (CMT) disease refers to a set of genetically inherited neurological disorders that damage peripheral nerves, the essential pathways that link the brain and spinal cord with other parts of the body. As the most common genetically passed neuropathy, CMT is characterised by progressive nerve injury that may cause loss of sensation, tingling, chronic pain, muscle weakness, and deformities of the feet. 

Additionally, in some instances, the disorder can extend to autonomic nerves, thus causing problems with sweating and dizziness.

In this guide, we will break down the causes, symptoms, diagnostic approaches, and treatment options for Charcot-Marie-Tooth disease. Read on for a comprehensive overview!

What is Charcot-Marie-Tooth Disease?

Charcot-Marie-Tooth disease, also called hereditary motor and sensory neuropathy, is an inherited condition that causes progressive damage primarily to the peripheral nerves in the arms and legs, leading to smaller, weaker muscles, difficulty walking, loss of sensation, and common foot issues like high arches.

Charcot (shahr-KOH)-Marie-Tooth disease pertains to the group of inherited disorders that result in nerve damage. Primarily, this damage is exhibited in the nerves of the extremities, i.e., the peripheral nerves. Besides that, Charcot-Marie-Tooth disease is known as hereditary motor and sensory neuropathy.

This disease leads to the gradual shrinking of muscles and their weakening. In addition, it can make walking difficult and result in numbness of the legs and feet. There are people who lose the ability to tense their muscles. Hamstrings and high arches are very common foot problems that arise. The manifestations of the disease usually start in the feet and legs. However, in the long run, the symptoms may extend to the hands and arms.

Additionally, a majority of people with Charcot-Marie-Tooth disease exhibit symptoms during their teenage years or early adulthood. However, the onset of symptoms can also be in the middle of life or even in toddlers.

What are the Causes of Charcot-Marie-Tooth Disease?

CMT is caused by inherited gene mutations, with over 100 gene changes linked to the condition, which are passed down through autosomal dominant, autosomal recessive, or X-linked patterns, resulting in peripheral nerve damage through either the loss of the protective myelin sheath (demyelination) or the shrinking of the axon.

Gene changes are the cause of CMT. It might be a change of one gene or several genes. More than 100 gene changes have been associated with the condition. Hence, it has a large number of different types. The gene change(s) are inherited from the biological parent(s). The categories of inheritance patterns are:

  • Autosomal Recessive: Both parents have to carry the altered gene to be able to pass it on.
  • Autosomal Dominant: Only one parent with the altered gene is enough to pass it on. Every child has a 50% chance of getting it.
  • X-linked: The altered gene is on the X chromosome. Males usually have more severe symptoms because they have only one X chromosome.

In the case of CMT, the gene changes interfere with the cells (neurons) of peripheral nerves in one or both of the following ways:

  • Myelin Loss: The myelin sheath is a protective cover that surrounds a part of a nerve cell. CMT can bring about too little or total myelin absence. This slows the nerve signal transmission speed. In such cases, CMT is a demyelinating disease.
  • Axon Damage: The axon is that part of a neuron that converts electrical signals into chemical ones. CMT can cause the shrinking or wasting away of the axons. Thus, the signals that come and go are weakened.

What are the Risk Factors of Charcot-Marie-Tooth Disease?

As CMT is a hereditary disease passed through genes, the key risk factors include having a family history of the disorder, with symptoms typically beginning in adolescence or early adulthood, although onset can occur at any age.

Charcot-Marie-Tooth disease is a hereditary disease. That means it passes from parents to children through genes. The significant risk factors are as follows:

  • Age: Usually, the onset of symptoms is in the teenage years or early adulthood, though they are capable of showing up at any age.
  • Gender: Both male and female are equally prone to the disease; however, some specific types may demonstrate gender bias.
  • Geographic Location: The prevalence of certain CMT types is higher in specific populations, for example, those of Northern European descent.
  • Family History: Having a family history of CMT makes you more likely to be affected by the disease.

What are the Symptoms of Charcot-Marie-Tooth Disease?

Symptoms of CMT, which vary in severity, often begin in adolescence or early adulthood, including muscle weakness and wasting in the feet and lower legs, loss of sensation in the limbs, and foot abnormalities like hammer toes and high arches, which can lead to problems with balance and gait.

The symptoms of Charcot-Marie-Tooth disease most commonly become apparent in adolescence or early adulthood. Primary symptoms of the disease are:

  • Muscle weakness and atrophy that initially involve the foot, lower leg, hand, and forearm
  • Sensory loss in the fingers, toes, and limbs

Moreover, the individual may experience other symptoms like:

  • Malformations of the foot muscles resulting in high arches and hammer toes
  • Difficulties in using the hands
  • Unsteady ankles and problems with balancing
  • Cramping in the lower legs and forearms
  • Partial loss of vision and hearing
  • Scoliosis
  • Reduced reflexes

The symptoms and their severity can be very different from one person to another and even between close relatives who have inherited the same condition. In fact, because the symptoms are so subtle, it is pretty standard that people do not recognise that they have CMT in the early stages of the disease.

Symptoms in Children

If symptoms appear during childhood, the child may:

  • Be clumsier than their peers and more prone to accidents
  • Show an abnormal gait due to difficulty in lifting the feet from the ground with each step
  • Having the feet drop forward while lifting the feet

Most of the other symptoms emerge when the child goes through puberty and then moves to adulthood, but can be present at any age, from very young children to those in their late 70s. 

Eventually, the leg may even undergo a transformation where the part below the knee becomes extremely skinny, while the thighs still have the normal muscles of volume and shape.

The symptoms, which have a tendency to become worse with time, may include:

  • The hands and arms are becoming weaker
  • Lessening of the ability to use the hands, for instance, doing up buttons or opening jars and bottle caps
  • Muscle and joint pain as a result of walking and posture problems, which place a strain on the body
  • Neuropathic pain caused by damaged nerves
  • Difficulties with walking and mobility, especially among the elderly

Supportive devices might include a wheelchair, a leg brace, certain types of shoes, or other orthopaedic devices.

What is the Diagnosis of Charcot-Marie-Tooth Disease?

The diagnosis of CMT involves a medical history and physical exam, which are supported by tests such as nerve conduction studies and electromyography to assess nerve function, with genetic testing or a nerve biopsy often used to confirm the specific type of nerve damage and gene mutation.

When diagnosing Charcot-Marie-Tooth disease, the doctor initially gathers information about the patient’s medical history and performs a physical examination to identify the symptoms of the disease.

Tests that can indicate to your doctor the cause and severity of the nerve damage include the following:

  • Nerve Conduction Studies: These tests measure the strength and speed of the signals sent through the nerves. Small electric shocks delivered by electrodes put on the skin stimulate the nerve. If the response is slow or weak, it may indicate a nerve disorder such as Charcot-Marie-Tooth disease.
  • Electromyography: This is also known as EMG. A thin needle electrode is put through the skin into a muscle by a healthcare professional. The test measures electrical activity when the muscle is relaxed and when it is slightly tightened by the patient. This might assist in determining the muscles that are affected by the condition.
  • Nerve Biopsy: A doctor removes a small piece of peripheral nerve from the back of the lower leg after cutting through the skin. The nerve sample is sent to the lab for testing to determine the cause of the nerve condition.
  • Genetic Testing: A blood sample is taken from the individual and is tested in the laboratory for common gene changes associated with Charcot-Marie-Tooth disease. Genetic testing might be helpful to those who suffer from the disease and want to plan their families. Besides that, a gene test can also rule out other sources of nerve damage. A genetic counsellor can provide information and support regarding the test.

What is the Treatment of Charcot-Marie-Tooth Disease?

While there is currently no cure for CMT, treatment focuses on relieving symptoms and maintaining mobility through physical and occupational therapy, pain management using medications like NSAIDs or TCAs, and the use of assistive devices like braces, splints, or orthopaedic shoes.

Currently, there is no cure for CMT. However, treatments may alleviate symptoms and curb the onset of physical impairments:

  • Non-steroidal anti-inflammatory medications (NSAIDs) like ibuprofen can be used to relieve joint and muscle pains and also pain due to nerve damage.
  • In a case where NSAIDs do not relieve the symptoms, the doctor may prescribe Tricyclic antidepressants (TCAs). Commonly used to treat depression, TCAs may help in neuropathic pain reduction. Nevertheless, they may have some side effects.
  • By means of low-impact and gentle exercises, physical therapy helps not only to strengthen but also to stretch muscles. It can be very effective in muscle retention for an extended time period as well as in the prevention of muscle contracture.
  • Occupational therapy can be a transforming factor for patients struggling with finger movement and grip strength, helping them regain control over everyday tasks that once felt frustrating or nearly impossible.
  • Assistive devices like specific orthopaedic devices, braces, or splints can be of help to the person in keeping the ability to move around and also in preventing injuries. Ankle support can be provided by high-top shoes or special boots, while certain types of shoes or shoe inserts can facilitate walking. For perfect hand coordination, thumb splints can be of assistance.
  • Cognitive behavioural therapy (CBT) may be helpful to CMT patients in managing everyday-life issues better and, if necessary, coping with depression as well.
  • In some cases, foot pain may be relieved and walking made easier through surgery to fuse bones in the feet or remove a part of a tendon. Surgery not only can correct flat feet but also can relieve joint pain and correct heel deformities.
  • If a patient develops scoliosis or curvature of the spine, they might be recommended to wear a back brace, and in some instances, surgery may be required as well.

What are the Complications of Charcot-Marie-Tooth Disease?

If left untreated, the progressive muscle weakness associated with CMT can lead to severe disability and significant mobility challenges, as well as chronic foot ulcers and deformities, which may also result in a psychosocial impact such as anxiety and depression.

If Charcot-Marie-Tooth disease is left untreated or not properly managed, it can give rise to several serious complications:

  • Severe Disability: Ongoing muscle weakness may gradually limit mobility, making independent movement increasingly difficult.
  • Foot Ulcers and Deformities: Abnormal foot structure and poor mechanics can cause skin breakdown, persistent ulcers, and infections.
  • Psychosocial Impact: Living with a chronic, progressive condition can affect emotional well-being, often contributing to anxiety, depression, and feelings of social withdrawal.

Short-Term and Long-Term Complications

The short-term complications of the disease may consist of falling and getting hurt due to muscle weakness. On the other hand, long-term complications can be chronic pain, severe disabilities, and the need for devices such as walking sticks.

FAQs about CMT

  1. Does the Charcot-Marie-Tooth affect the heart?

Peripheral muscle atrophy is the main characteristic of Charcot-Marie-Tooth disease (peroneal muscular atrophy). In this condition, cardiac arrhythmias and conduction disturbances have been observed.

  1. Is CMT genetic or hereditary?

Yes, CMT is both genetic and hereditary, caused by mutations in the genes that control peripheral nerve function. A child may inherit the faulty gene from one or both parents, and there is no single gene responsible for all types of CMT.

  1. Can CMT affect the kidneys?

In case the person is affected by CMTDIE, which is a subtype of CMT, it can lead to issues in the kidneys. Thus, for CMTDIE patients, doctors always recommend regular proteinuria testing and follow-up with a kidney specialist in case of elevated urine protein levels. 

  1. What are the early signs of CMT?

Primary symptoms of CMT:

  • Muscle weakness in the feet, ankles, and legs at first
  • Extremely high arches of the feet, which can make the ankle unstable, or very flat feet
  • Curling of one’s toes (hammer toes)
  • Not being able to walk properly because of the weakness of the ankle muscles, which results in a weird or high step
  1. What can make CMT worse?

Certain medications that are referred to as neurotoxic drugs may injure the peripheral nerves and cause the symptoms of individuals with CMT to become worse. Such drugs can speed up nerve damage; hence, muscle weakness may become more severe, loss of sensation can occur, or other complications may develop.

Conclusion

To sum up, Charcot-Marie-Tooth disease (CMT) is a neurological disorder that affects the peripheral nerves and eventually causes the muscles to weaken, the sensation to be lost, and coordination to be decreased. Besides these, the diagnosis of CMT is based on clinical presentation, family history, and genetic testing. 

But still, no cure for CMT exists, though treatment options, which include therapy, orthopaedic interventions, and pain management strategies, can be undertaken. The prognosis of CMT depends on various factors, such as the seriousness of symptoms, the age at which the disease occurs, and the genetic subtype. However, with good management and support, people with CMT can live a fulfilling life.

Looking to learn about more such hereditary conditions in an in-depth manner? DocTutorials covers a large repository of such topics, along with other subjects, helping you ace your NEET PG preparation. Check out our NEET PG courses today!

NEET PG Online Live Power Pack
DocTutorials App Download Now

Latest Blogs

NEET PG Online Live Power Pack
DocTutorials App Download Now