Mastering External Fixation Principles for Subtrochanteric Fractures: A High-Yield Guide for PG Residents
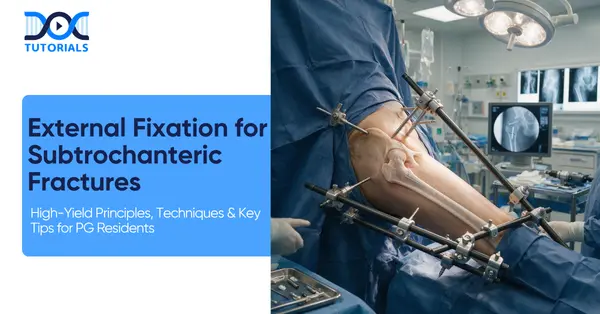
In orthopedic trauma, managing severe lower extremity injuries requires a strong grasp of biomechanics and soft tissue biology. For postgraduate residents preparing for board exams and surgical practice, applying sound external fixation principles to complex injuries like subtrochanteric fractures is essential. This guide synthesizes key concepts, pin biomechanics, surgical steps, and complication management into a high-yield revision resource.
Get High Quality, High Yield Orthopedics PG Residency Notes for Free!
Indications and Biomechanical Foundations
While intramedullary nailing remains standard for closed femoral shaft injuries, applying external fixation principles is critical when handling open wounds, soft tissue compromise, or polytrauma.
Primary Indications and Contraindications
- Open Fractures: External frames bypass contaminated soft tissue envelopes, placing hardware away from the injury zone to reduce hardware infection risks.
- Polytrauma & Damage Control Orthopedics (DCO): In unstable patients requiring life-saving stabilization, provisional fixation must be applied rapidly—ideally within 15–20 minutes.
- Specialty Uses: Include compression mode for pelvic shock hemorrhage, delta frames, and Ilizarov ring constructs for deformity correction, bone transport, and infected non-unions.
- Relative Contraindications: Patient non-compliance and morbid obesity (170–200 kg), where deep adipose tissue obscures bony landmarks and makes Shanz pin placement difficult.
Management Workflow: Open Fractures / Polytrauma Radical Debridement -> External Fixation (2 cm Gap, Safe Zones) -> Pin Tract Monitoring -> 2-3 Weeks Later: Convert to Internal Fixation
Construct Biomechanics and Pin Rules
Construct stability relies on strict biomechanical rules. When stabilizing high-load areas seen in subtrochanteric fractures, understanding frame dynamics prevents mechanical failure.
The Laws of Rigidity and Pin Placement
- Stiffness: Rigidity scales with the fourth power of the pin radius. Doubling pin thickness increases construct rigidity by 16 times (16x).
- The Rule of Thirds: Maximum pin diameter must never exceed 1/3 of the bone shaft diameter. Exceeding this creates a severe stress-riser, increasing refracture risk upon removal.
- Pin Proximity and Span: Pins should be placed close to the fracture line (outside the contaminated zone) while maximizing the distance (span) between pins within the same fragment.
- Soft Tissue Gap: Always maintain an exact 2 cm gap between the rod and skin to accommodate post-traumatic edema.
- Rod Material: Carbon fiber rods offer higher rigidity and radiolucency for postoperative imaging.
Pin Selection and Material Properties
| Pin Type / Material | Design Features | Clinical Application & Indications |
| Schanz Pin | Partially threaded tip | Standard half-pin for trauma frame constructs |
| Steinmann Pin | Smooth shaft | Skeletal traction and delta frame constructs |
| Conical Pin | Self-drilling tapering threads | Limb Reconstruction Systems (LRS) |
| Stainless Steel | Standard stiffness | Standard, widely available material |
| Titanium | Lower modulus of elasticity | Matches bone stress-strain index; reduces stress shielding & infection |
| Hydroxyapatite (HA) | Bioactive coating | Superior osteo-integration; ideal for osteoporotic or malignant bone |
Insertion Biomechanics: Pre-Drilled vs. Self-Drilling Pins
- Pre-Drilled Pins: Require a pilot hole drilled under continuous cold saline irrigation. This minimizes peak insertion temperatures, prevents thermal necrosis, and reduces risk of premature pin loosening. This is the mandatory choice for definitive fixation.
- Self-Drilling Pins: Faster to insert but generate high frictional heat, causing thermal necrosis, cortical micro-fractures, and lower pull-out strength. Strictly reserved for emergency DCO or pelvic fixation.
Why are self-drilling pins contraindicated for long-term external fixation in subtrochanteric fractures?
Self-drilling pins generate high frictional heat during insertion without a pilot hole, causing thermal necrosis of the surrounding cortical bone. This leads to micro-fractures, reduced pull-out strength, and premature pin loosening. For long-term fixation or bridging of subtrochanteric fractures, pre-drilling with continuous cold saline irrigation is mandatory to preserve bone viability.
Anatomical Safe Zones and Technical Execution
Surgica precision during pin insertion protects neurovascular structures. When managing subtrochanteric fractures, pins m l ust follow safe corridors in the proximal femur.
Regional Anatomical Safe Zones
- Femur: Anterolateral or direct lateral entry (through vastus lateralis).
- Humerus: Proximal anterolateral; distal posterolateral (specifically avoiding the olecranon fossa).
- Forearm: Ulna along its subcutaneous border; radius directly dorsal (dorsolateral insertion risks injury to the superficial radial nerve).
- Tibia: Subcutaneous anteromedial border, perpendicular to the cortex.
Step-by-Step Application Protocol
- Debridement: Radical wound debridement and thorough wash. Remember the rule: “Dead bone is not buried”—all devitalized bone fragments must be removed to prevent sequestrum formation.
- Reduction: Achieve provisional reduction of length, alignment, and rotation.
- Incision: Make a 1 cm skin incision centered in the safe zone.
- Dissection: Bluntly dissect down to bone using artery forceps, then insert a tissue protection sleeve.
- Drilling: Drill a pilot hole using continuous cold saline irrigation.
- Insertion: Hand-insert Schanz pins using a manual T-handle (typically 3 proximal and 3 distal).
- Assembly: Connect pins to carbon fiber rods via clamps, re-verify fracture reduction, and perform final tightening.
Technical Application Pitfalls
- Proud Pins: Leaving pins excessively long beyond the far cortex in the femur risks lacerating the femoral artery or causing a pseudoaneurysm. Pass only 1–2 thread turns beyond the far cortex.
- Eccentric Pin Placement: Trapping skin under tension causes skin strangulation and pin-site breakdown. If skin binding occurs, immediately extend the incision to relieve tension.
Pin Site Care, Infection Classification, and Conversion Staging
Postoperative vigilance prevents pin-tract infections, which are the single most common complication of external fixation.
Pin Care Best Practices
Daily care requires strict hand hygiene, sterile gloves, and saline swab cleaning moving upward from the skin. Dried exudate must be aggressively removed because it serves as a nidus for bacterial growth, rather than a protective scab.
Pin-Tract Infection Classification (Checketts-Otterburn) and Protocols
| Grade | Clinical Appearance | Recommended Management Protocol |
| 1 | Slight erythema, minimal discharge | Intensify local pin care protocol |
| 2 | Erythema, purulent discharge, soft tissue pain | Oral or topical antibiotics + improved pin care |
| 3 | Grade 2 presentation failing antibiotic therapy | Remove affected pin; change antibiotic regimen |
| 4 | Soft tissue infection involving multiple pins | Remove loose pins; systemic antibiotics |
| 5 | Grade 4 with radiographic bone involvement (ring sequestrum) | Remove entire fixator construct + formal pin-tract curettage |
| 6 | Persistent infection post-fixator removal | Operative debridement, irrigation, systemic antibiotics |
Conversion to Internal Fixation
External fixators serve as temporary bridges (typically 2 to 3 weeks) until soft tissue edema resolves.
- Clean Pin Sites: If pin sites show no signs of infection, proceed directly to single-stage internal fixation (e.g., intramedullary nailing).
- Infected Pin Sites (Grades 2–5): Direct conversion is contraindicated due to the risk of intramedullary canal contamination. A two-stage protocol is required:
- Stage 1: Remove external fixator, perform radical pin-tract debridement, and place patient on targeted systemic antibiotics.
- Stage 2: Perform definitive internal fixation only after infection has fully cleared.
Frequently Asked Questions (FAQs)
1. What is the maximum safe pin diameter relative to bone shaft size?
Pin diameter must not exceed 1/3 of the bone shaft diameter to avoid creating a severe stress-riser and subsequent refracture.
2. How much does doubling a pin’s diameter increase frame stiffness?
Because stiffness scales with radius to the fourth power (R4), doubling pin diameter increases construct stiffness by 16 times (16x).
3. Why is pre-drilling preferred over self-drilling pins for definitive fixation?
Pre-drilling with continuous cold saline irrigation minimizes insertion heat, preventing thermal necrosis, micro-fractures, and premature loosening.
4. What distance should be maintained between the fixator rod and the skin?
Maintain an exact 2 cm gap to allow sufficient room for postoperative soft tissue edema.
5. What is the target timeframe for damage control external fixation in polytrauma?
Provisional damage control frames should be applied rapidly within 15 to 20 minutes.
6. What anatomical safe corridor is used for femoral pin placement?
Pins are placed along the anterolateral or direct lateral aspect of the femur through the vastus lateralis.
7. What is the danger of leaving pins “proud” past the far cortex in the femur?
A proud pin protruding excessively past the medullary canal risks lacerating the femoral artery or creating a pseudoaneurysm.
8. Should dried exudate around pin sites be left intact as a biological barrier?
No. Dried exudate must be meticulously removed during daily pin care because it acts as a nidus for infection.
9. What finding in Grade 5 pin-tract infection mandates construct removal?
Radiographic evidence of bone involvement (such as a ring sequestrum) mandates complete removal of the frame and pin-tract curettage.
10. How should an infected external fixator be converted to internal fixation?
It requires a two-stage protocol: first remove the fixator and debride pin tracts under antibiotic coverage, then perform internal fixation once infection resolves.
Latest Blogs
-

NEET SS Exam 2024: Analysis, Key Dates, Counselling
The NEET SS 2024 exam kicked off on March 29, 2025. Over two days and two slots, candidates across 13…
-

INI SS Topper: 1 Dream, 1 Study Buddy, 1 Rank – The Journey of Dr. Prithivi Raaj, CML 1 & (AIIMS) AML 1 in DM Cardiology
Achieving the top rank in a competitive exam like the INI SS DM Cardiology requires tireless dedication, a structured approach,…
-

INI SS Results: Merit List, Exam Insights, and What Comes Next
The INI SS results for October 2024 are just around the corner. This is a life-changing moment for thousands of…